2022 Growing Recap: Fall/Winter

New Projects: Fall 2022

  • Popcorn

  • Wall of peas!

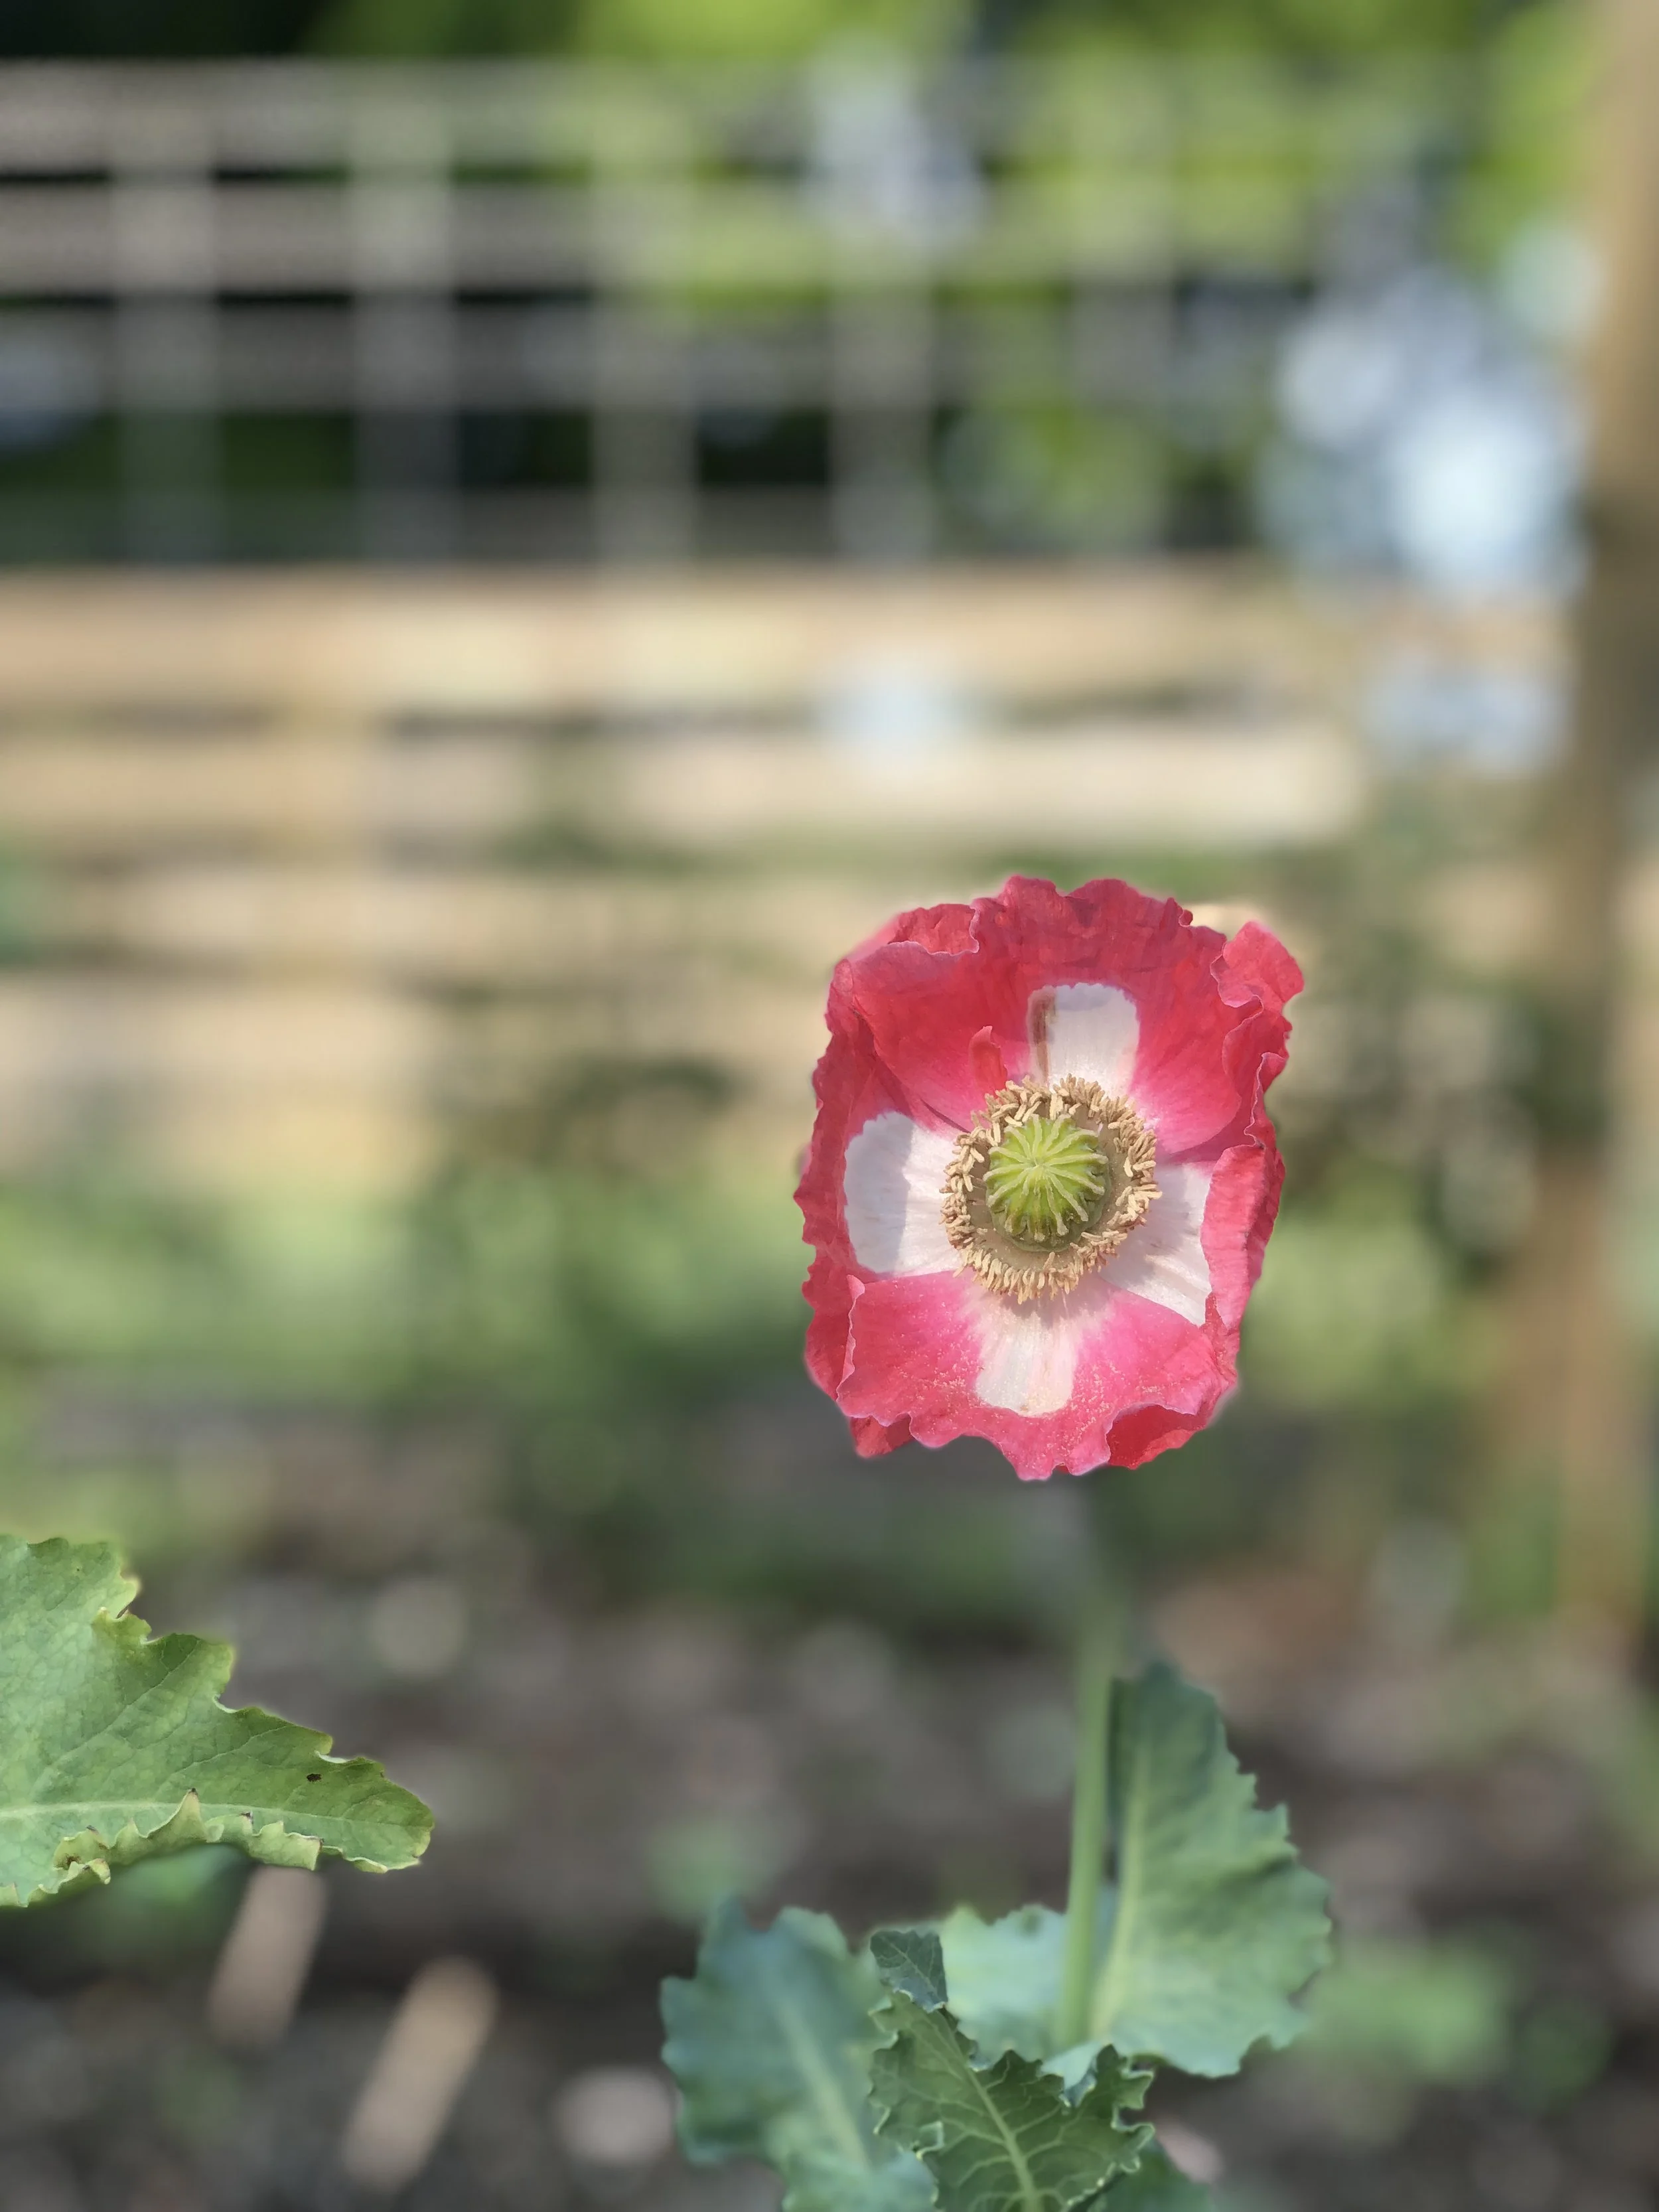
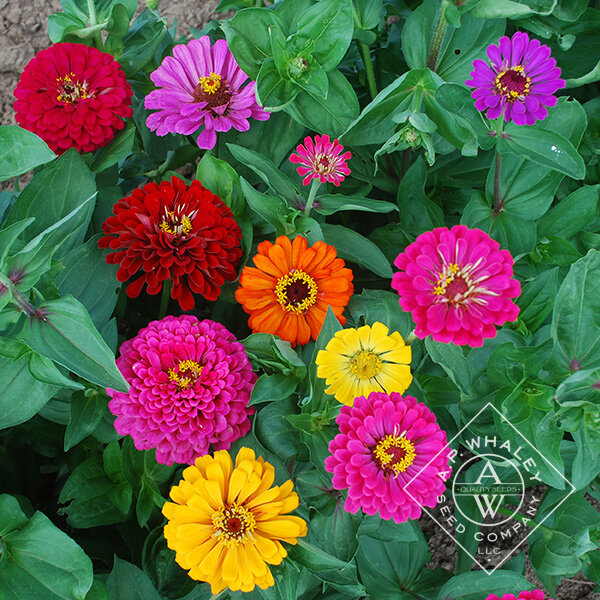
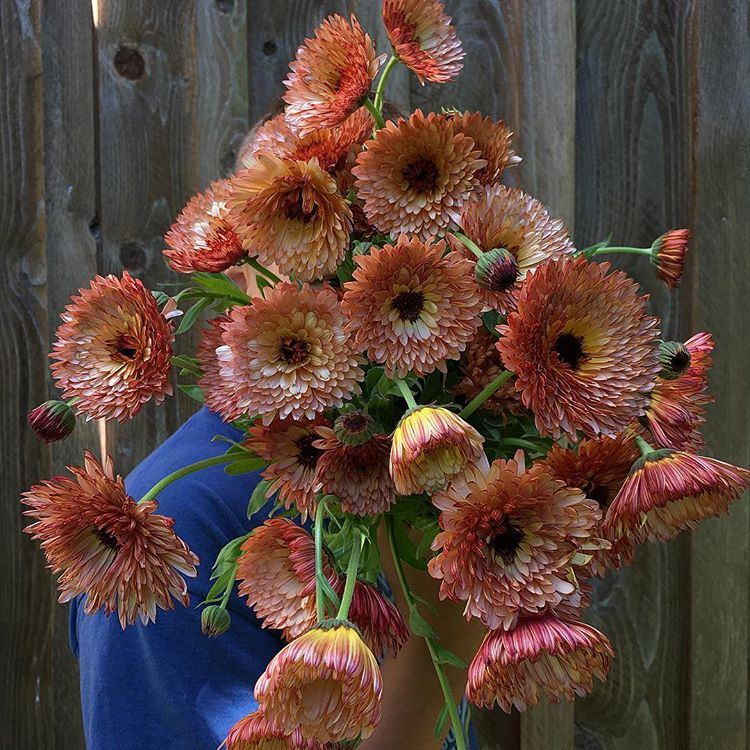
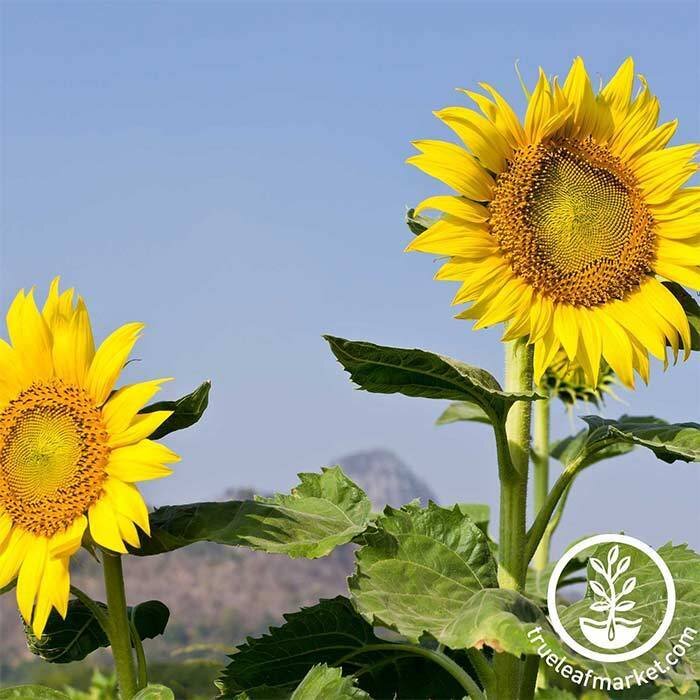
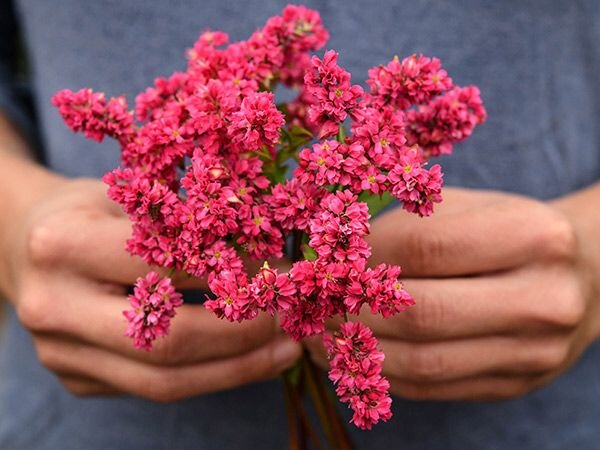
  • Expanded flowers through the fall
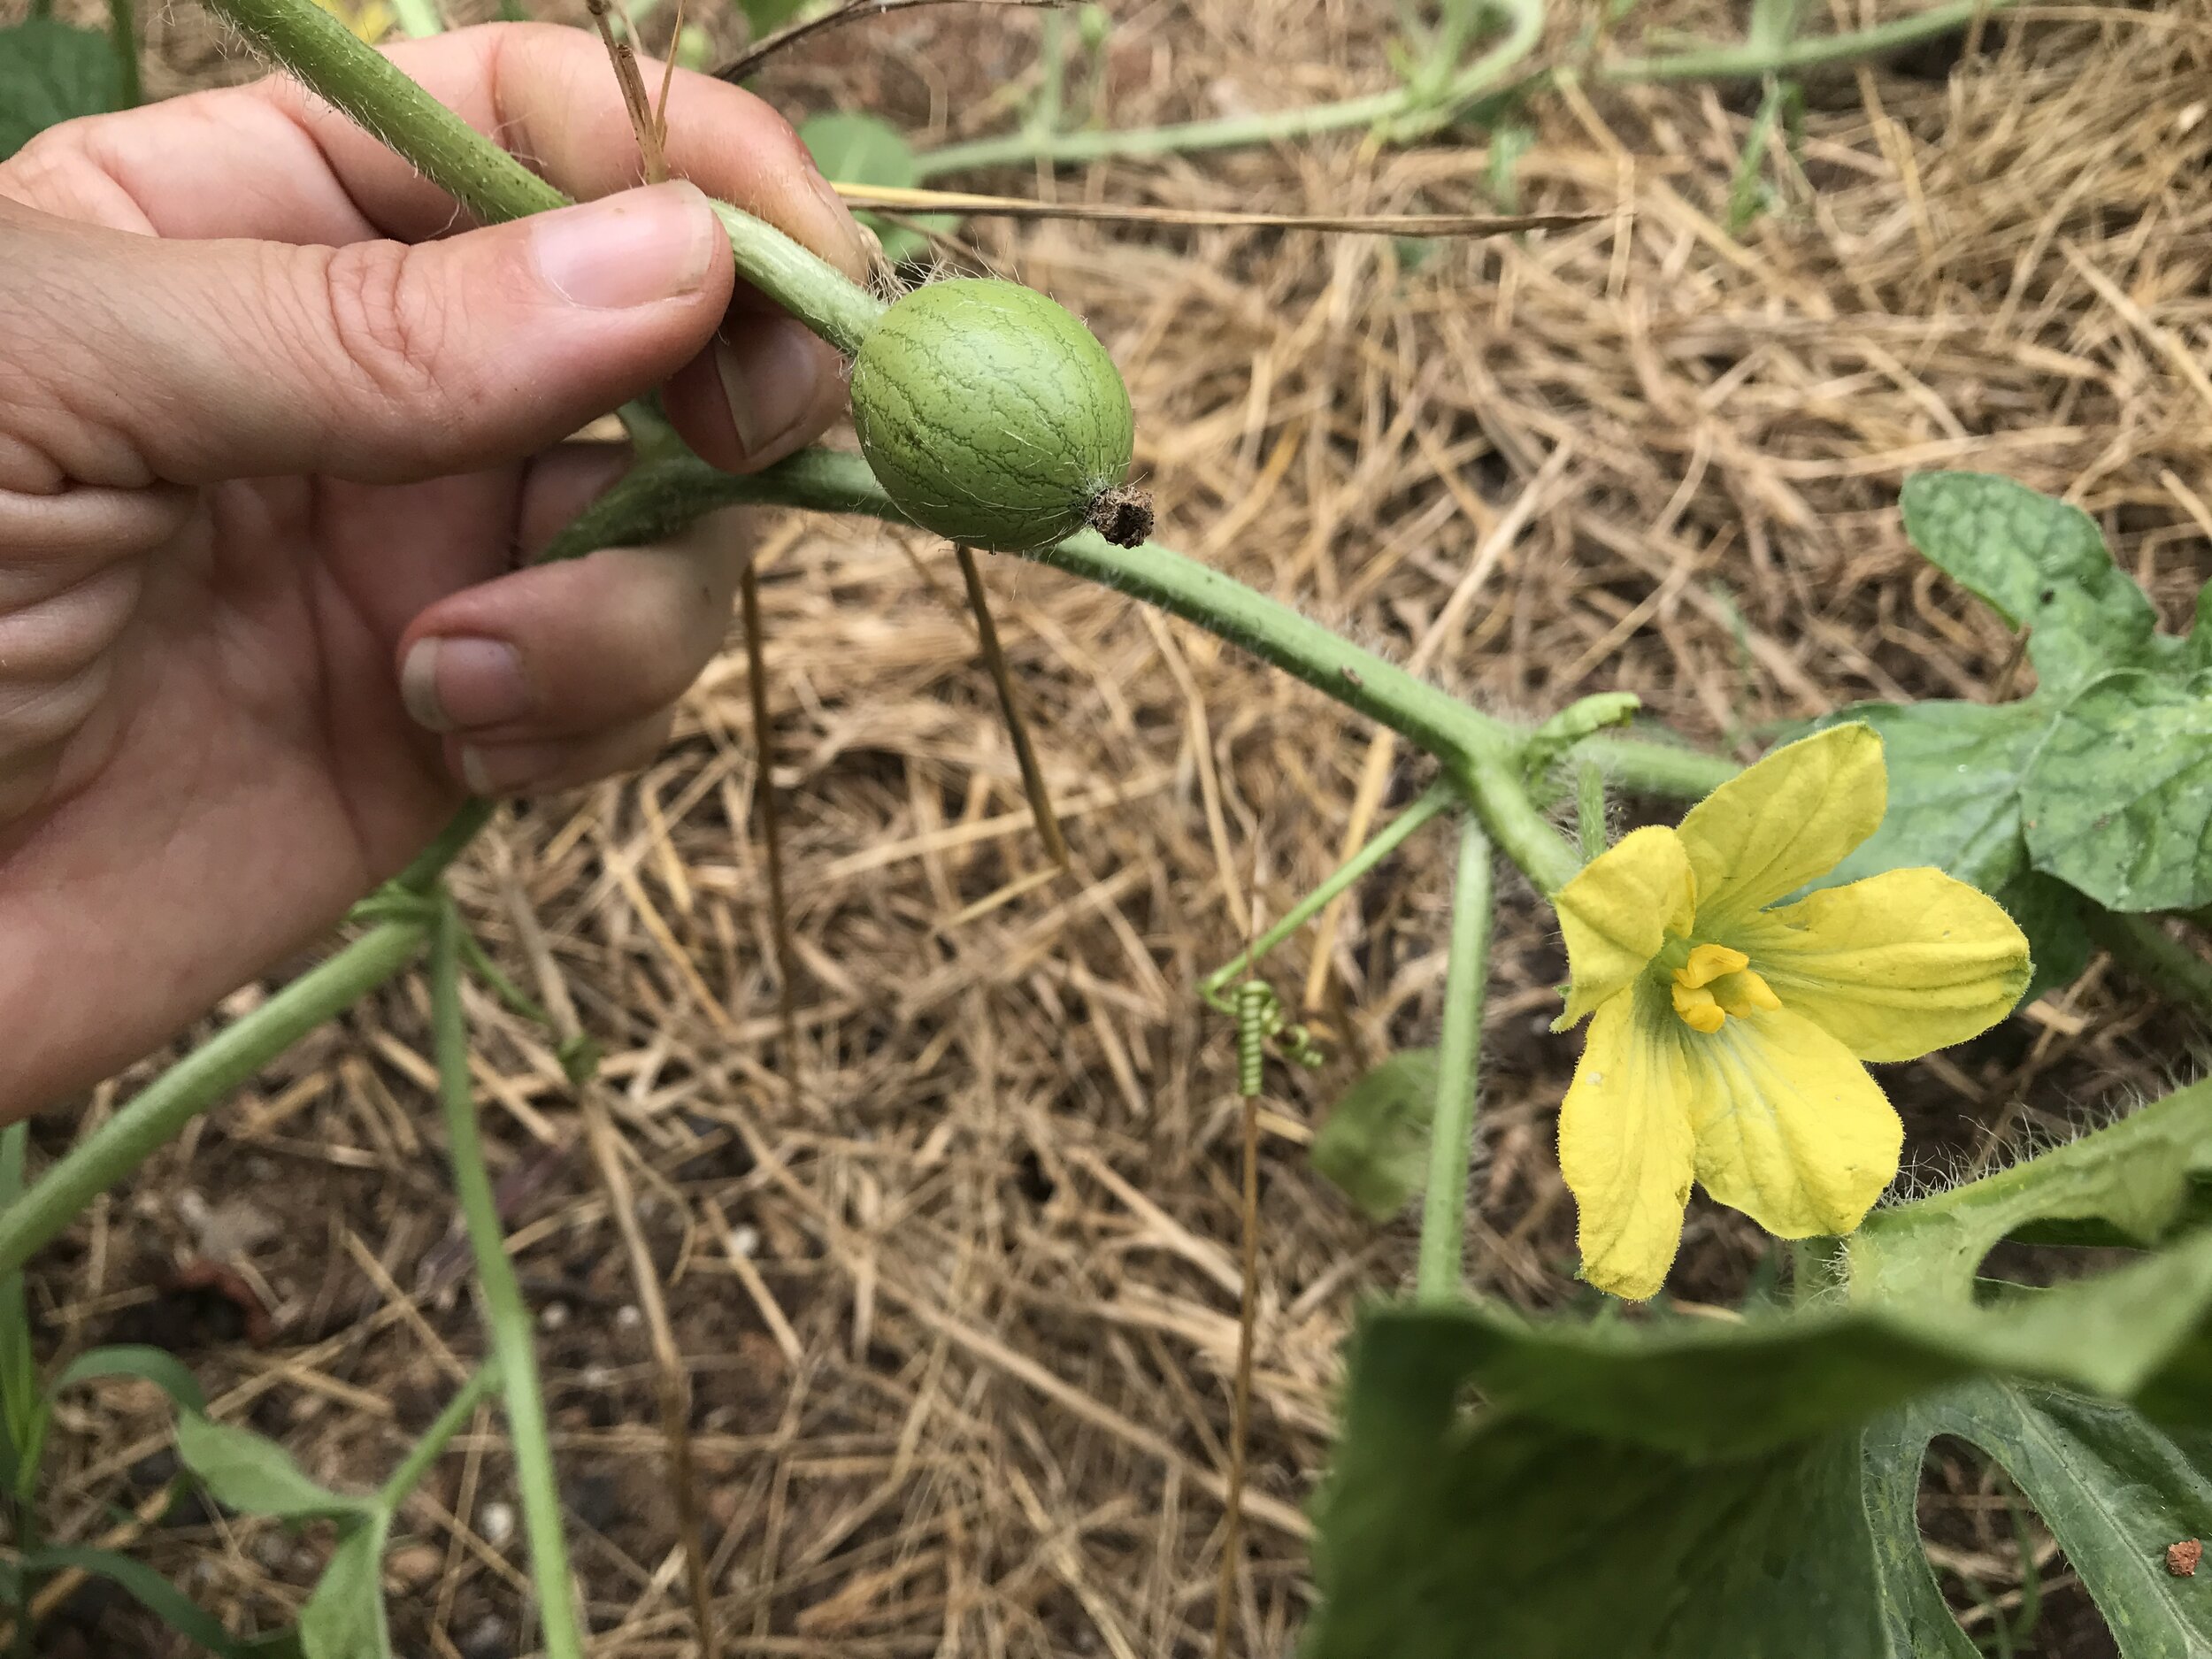
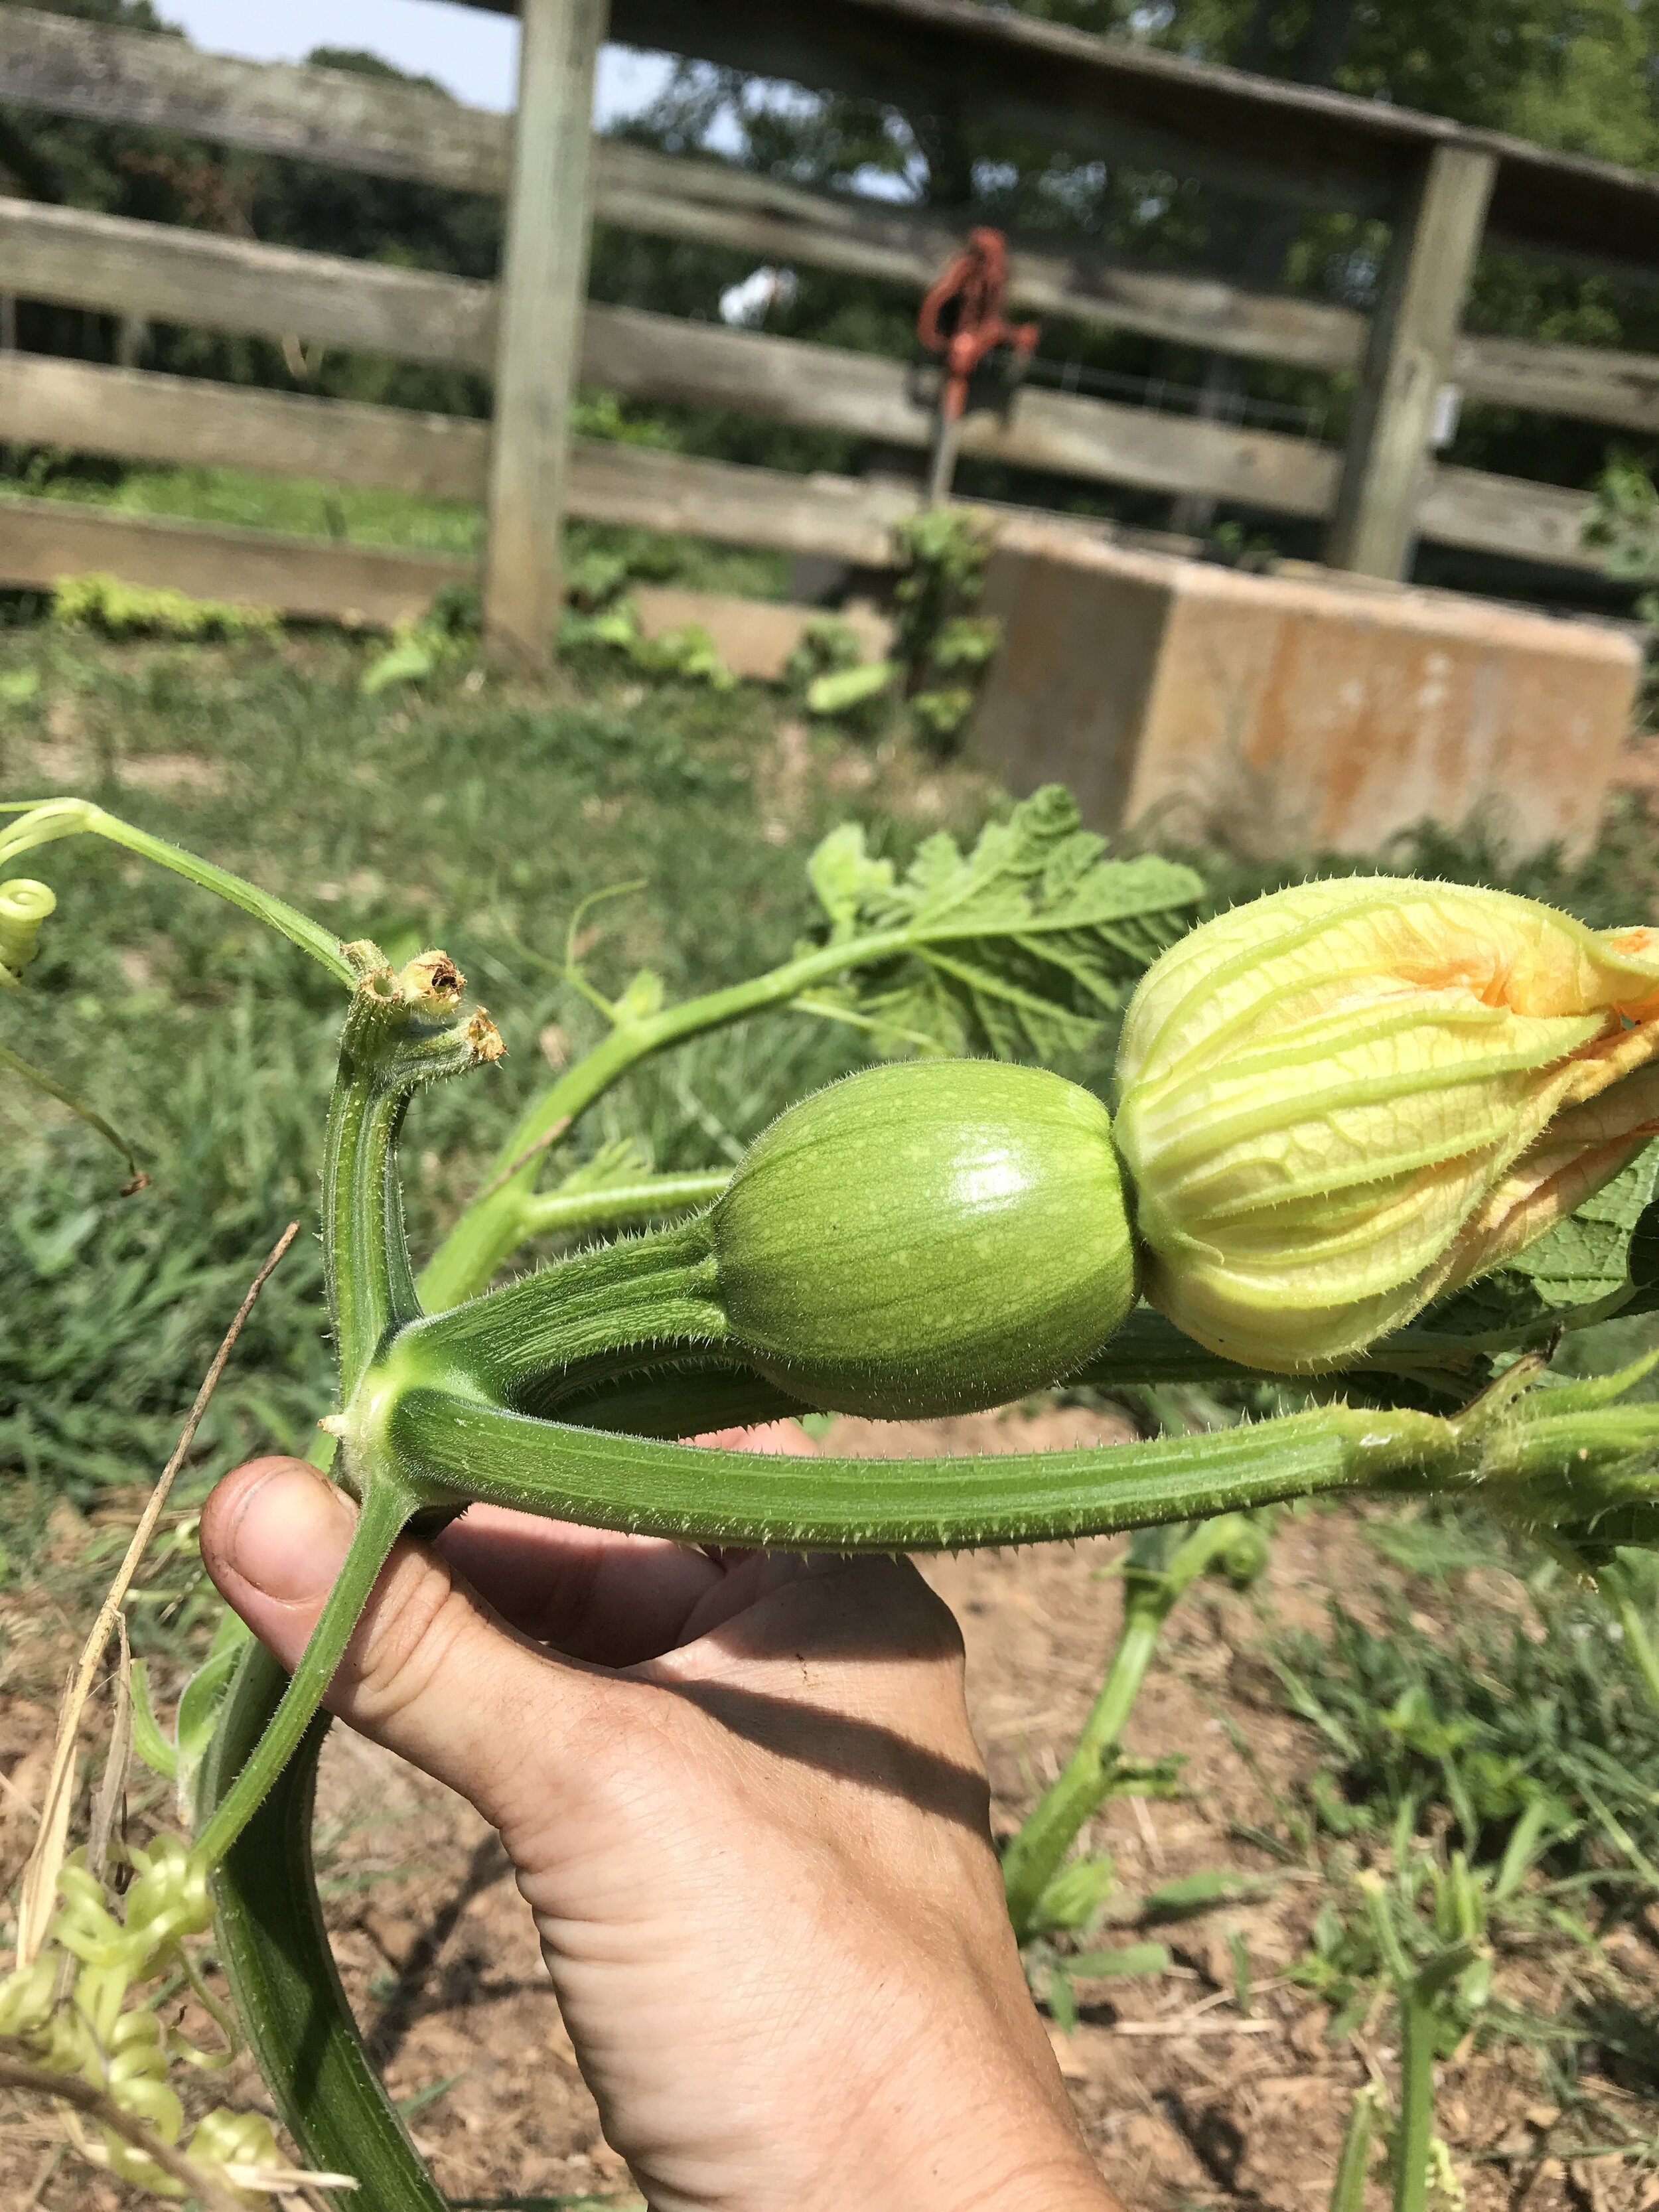
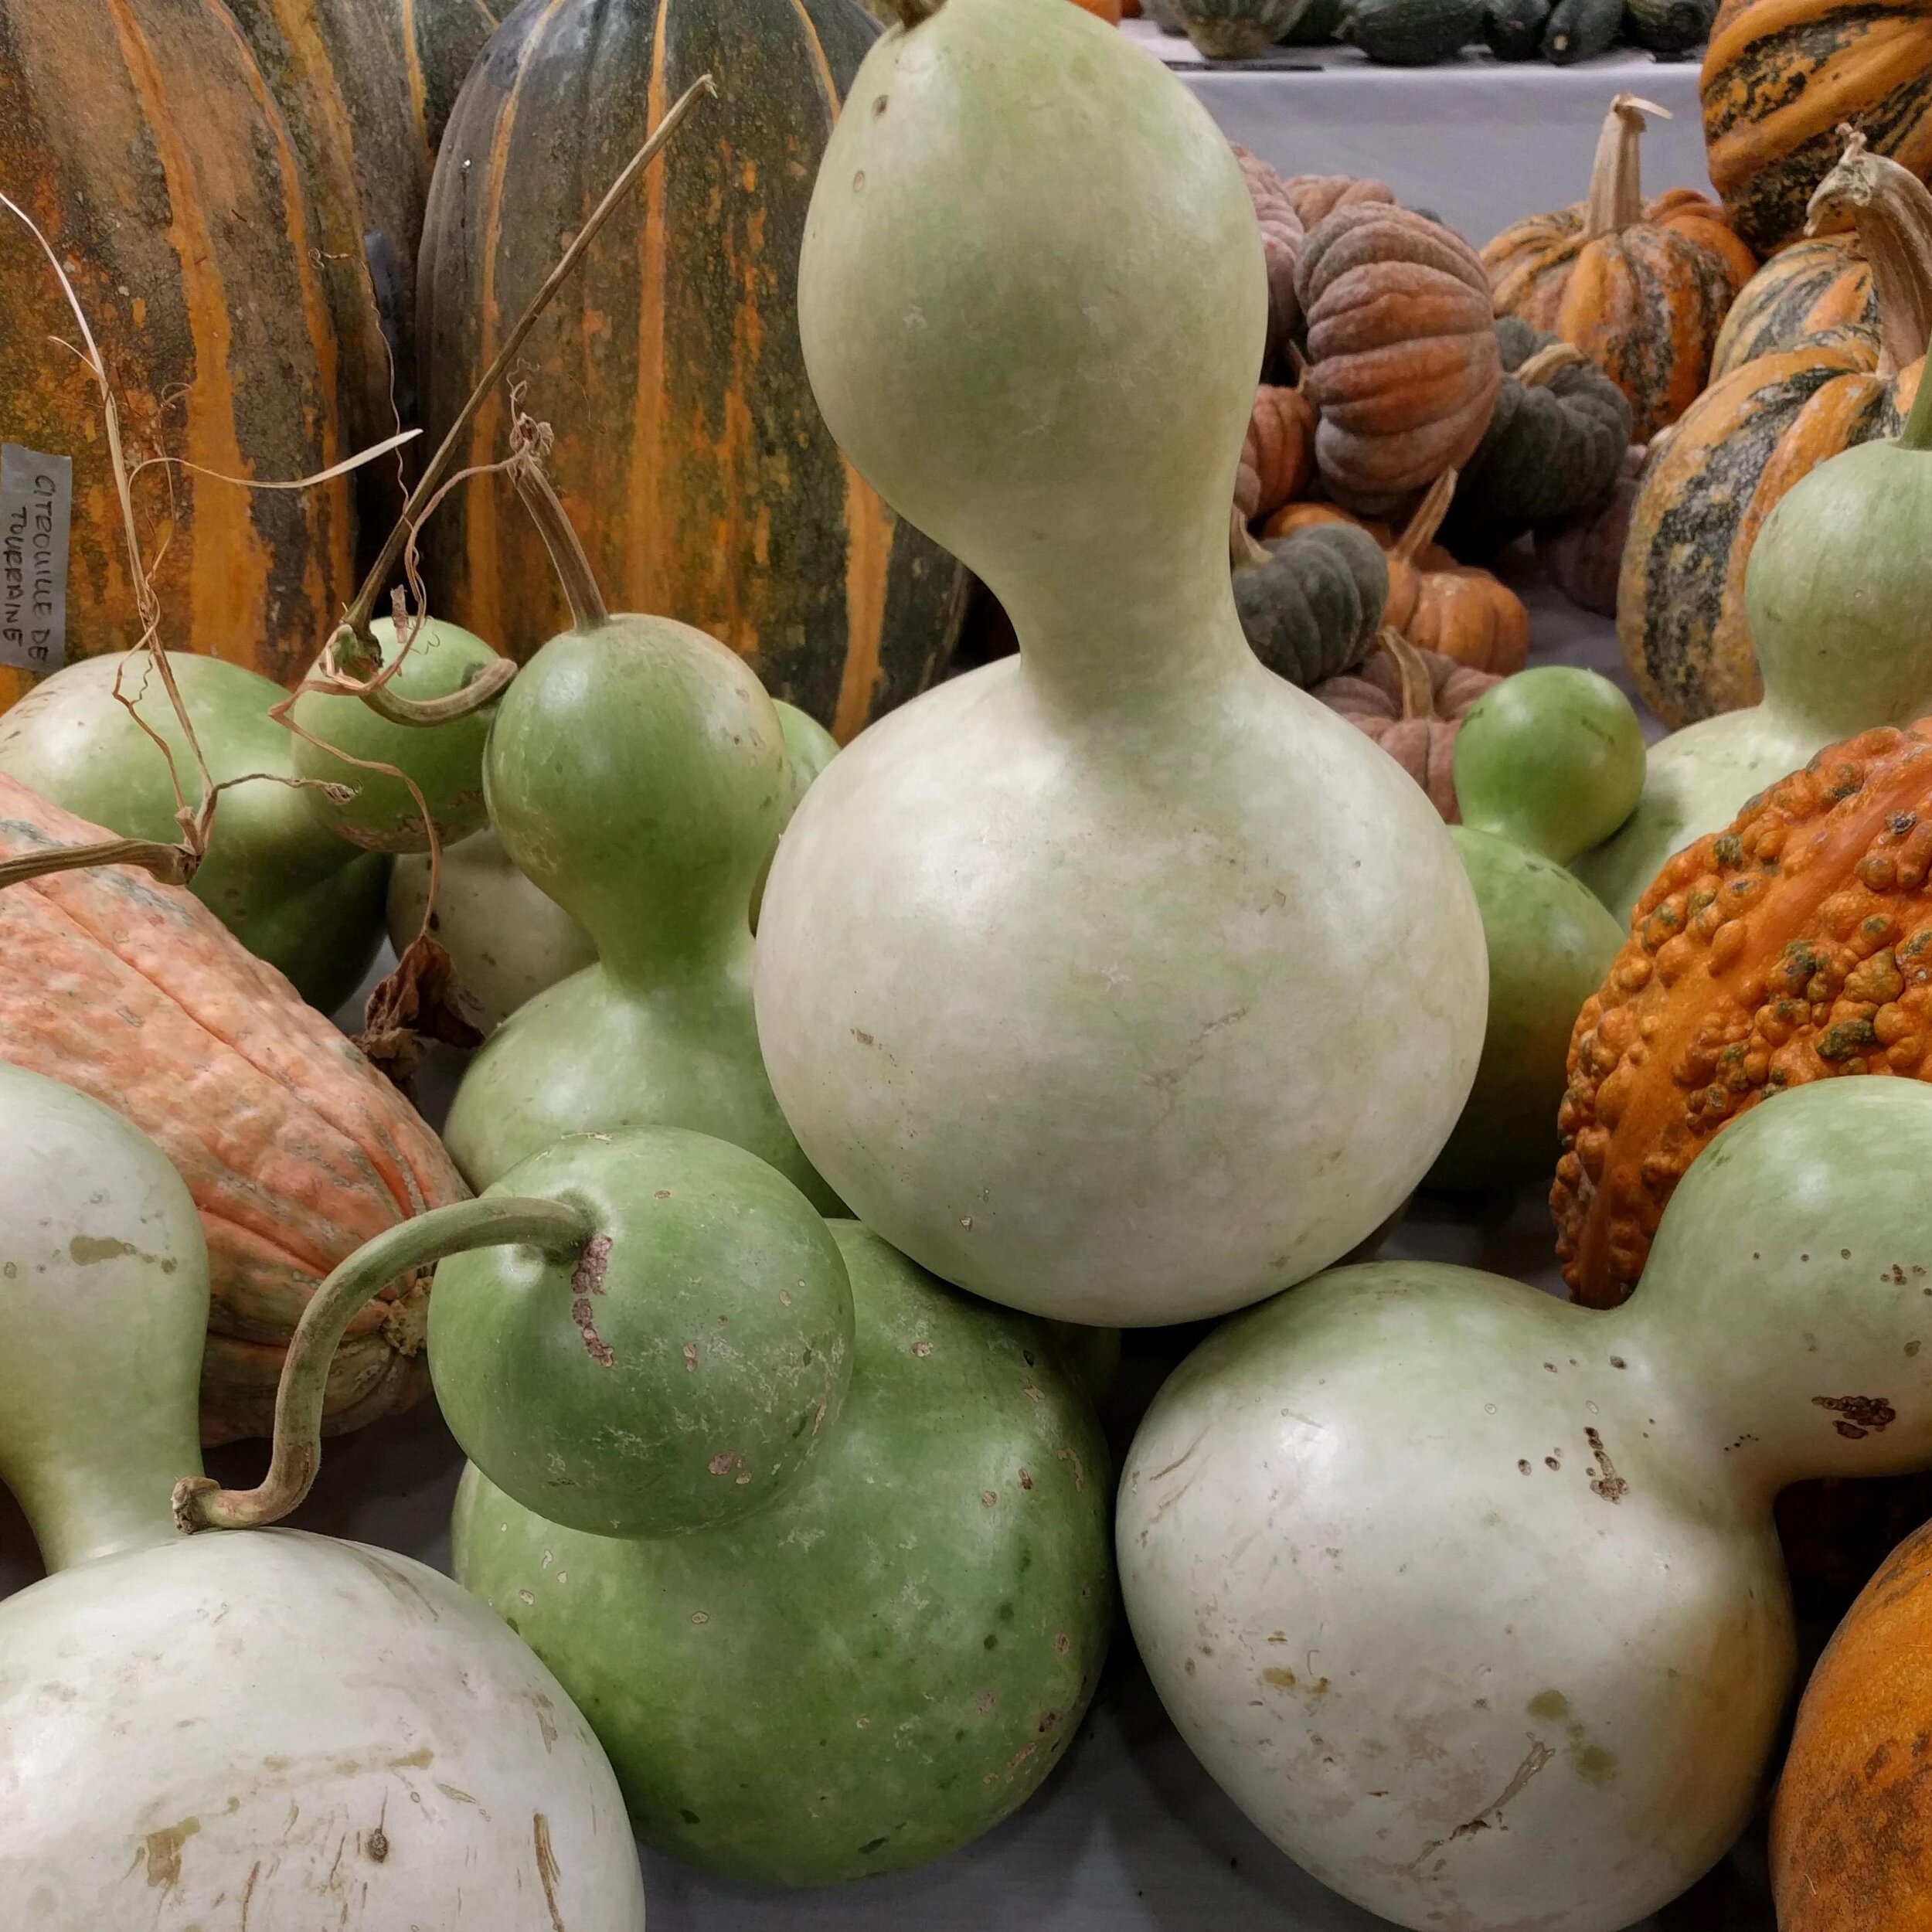
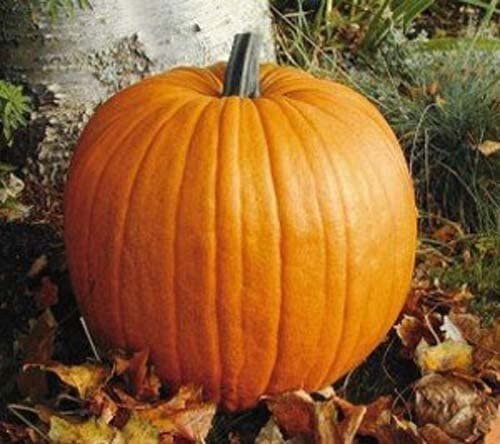
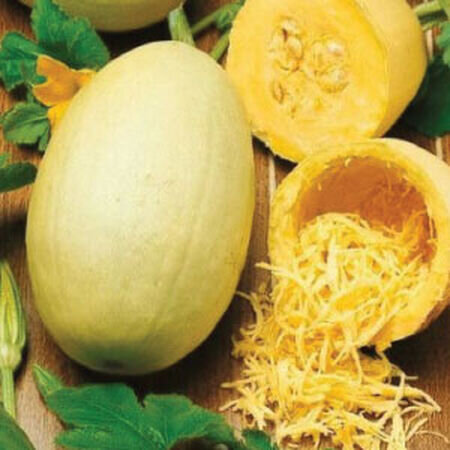
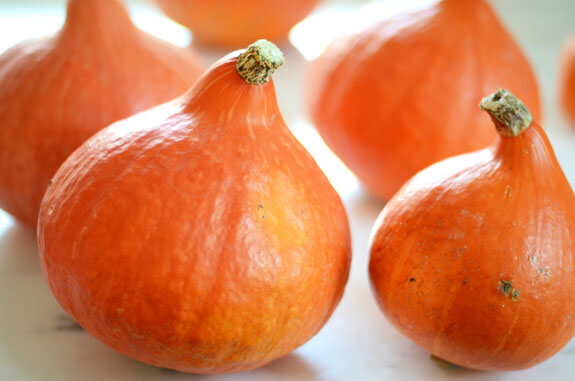
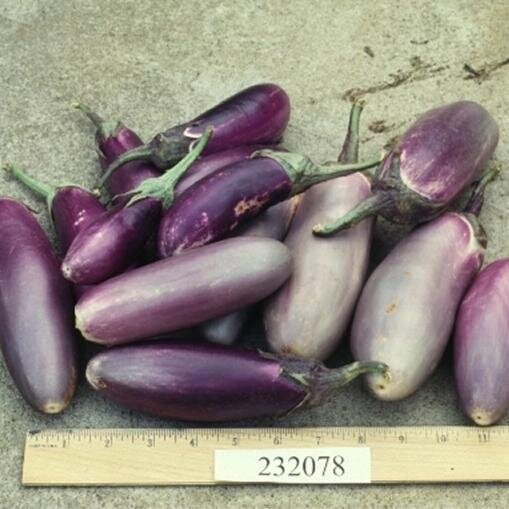
  • Tiny gourds

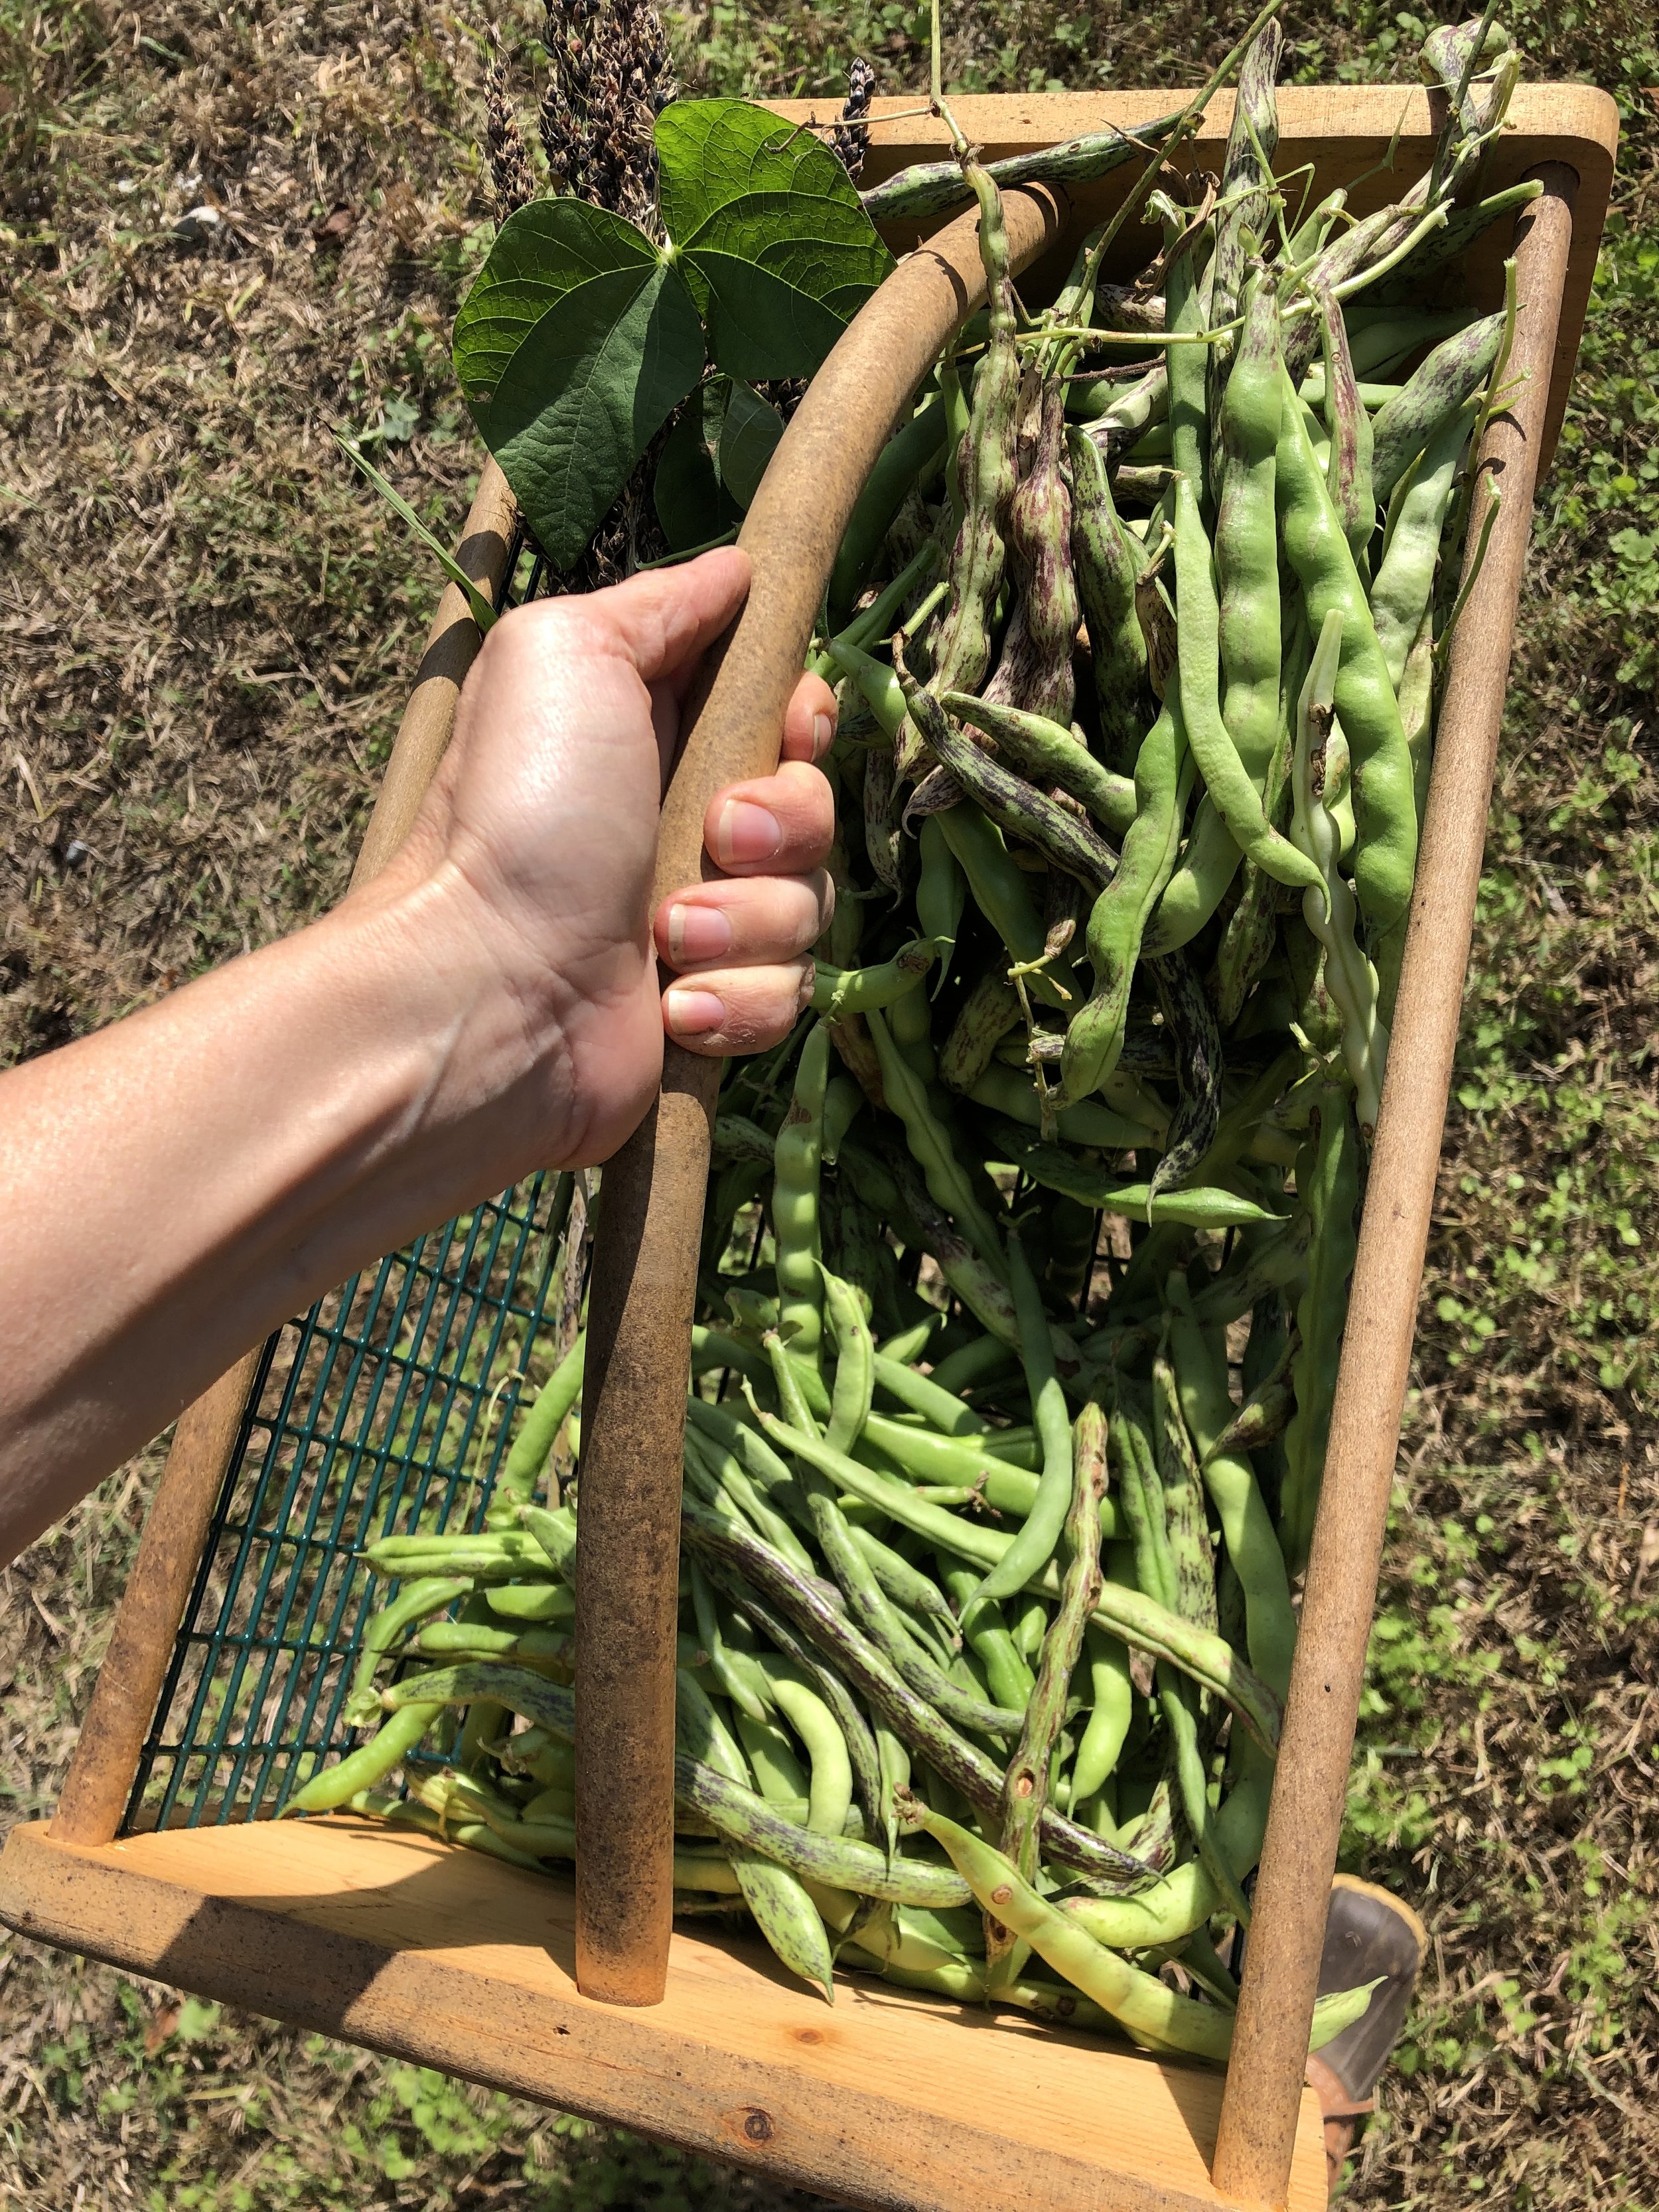
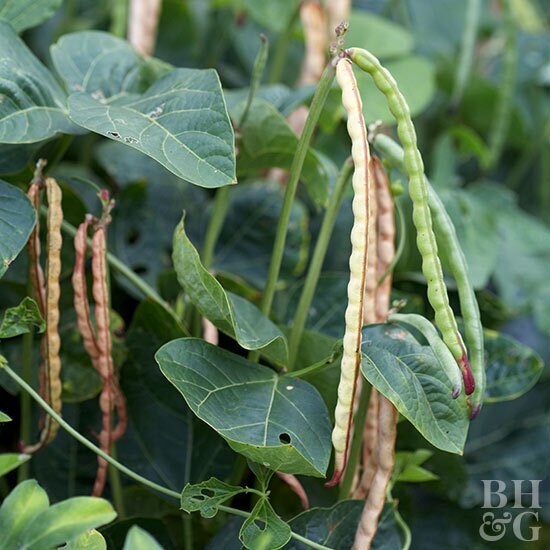
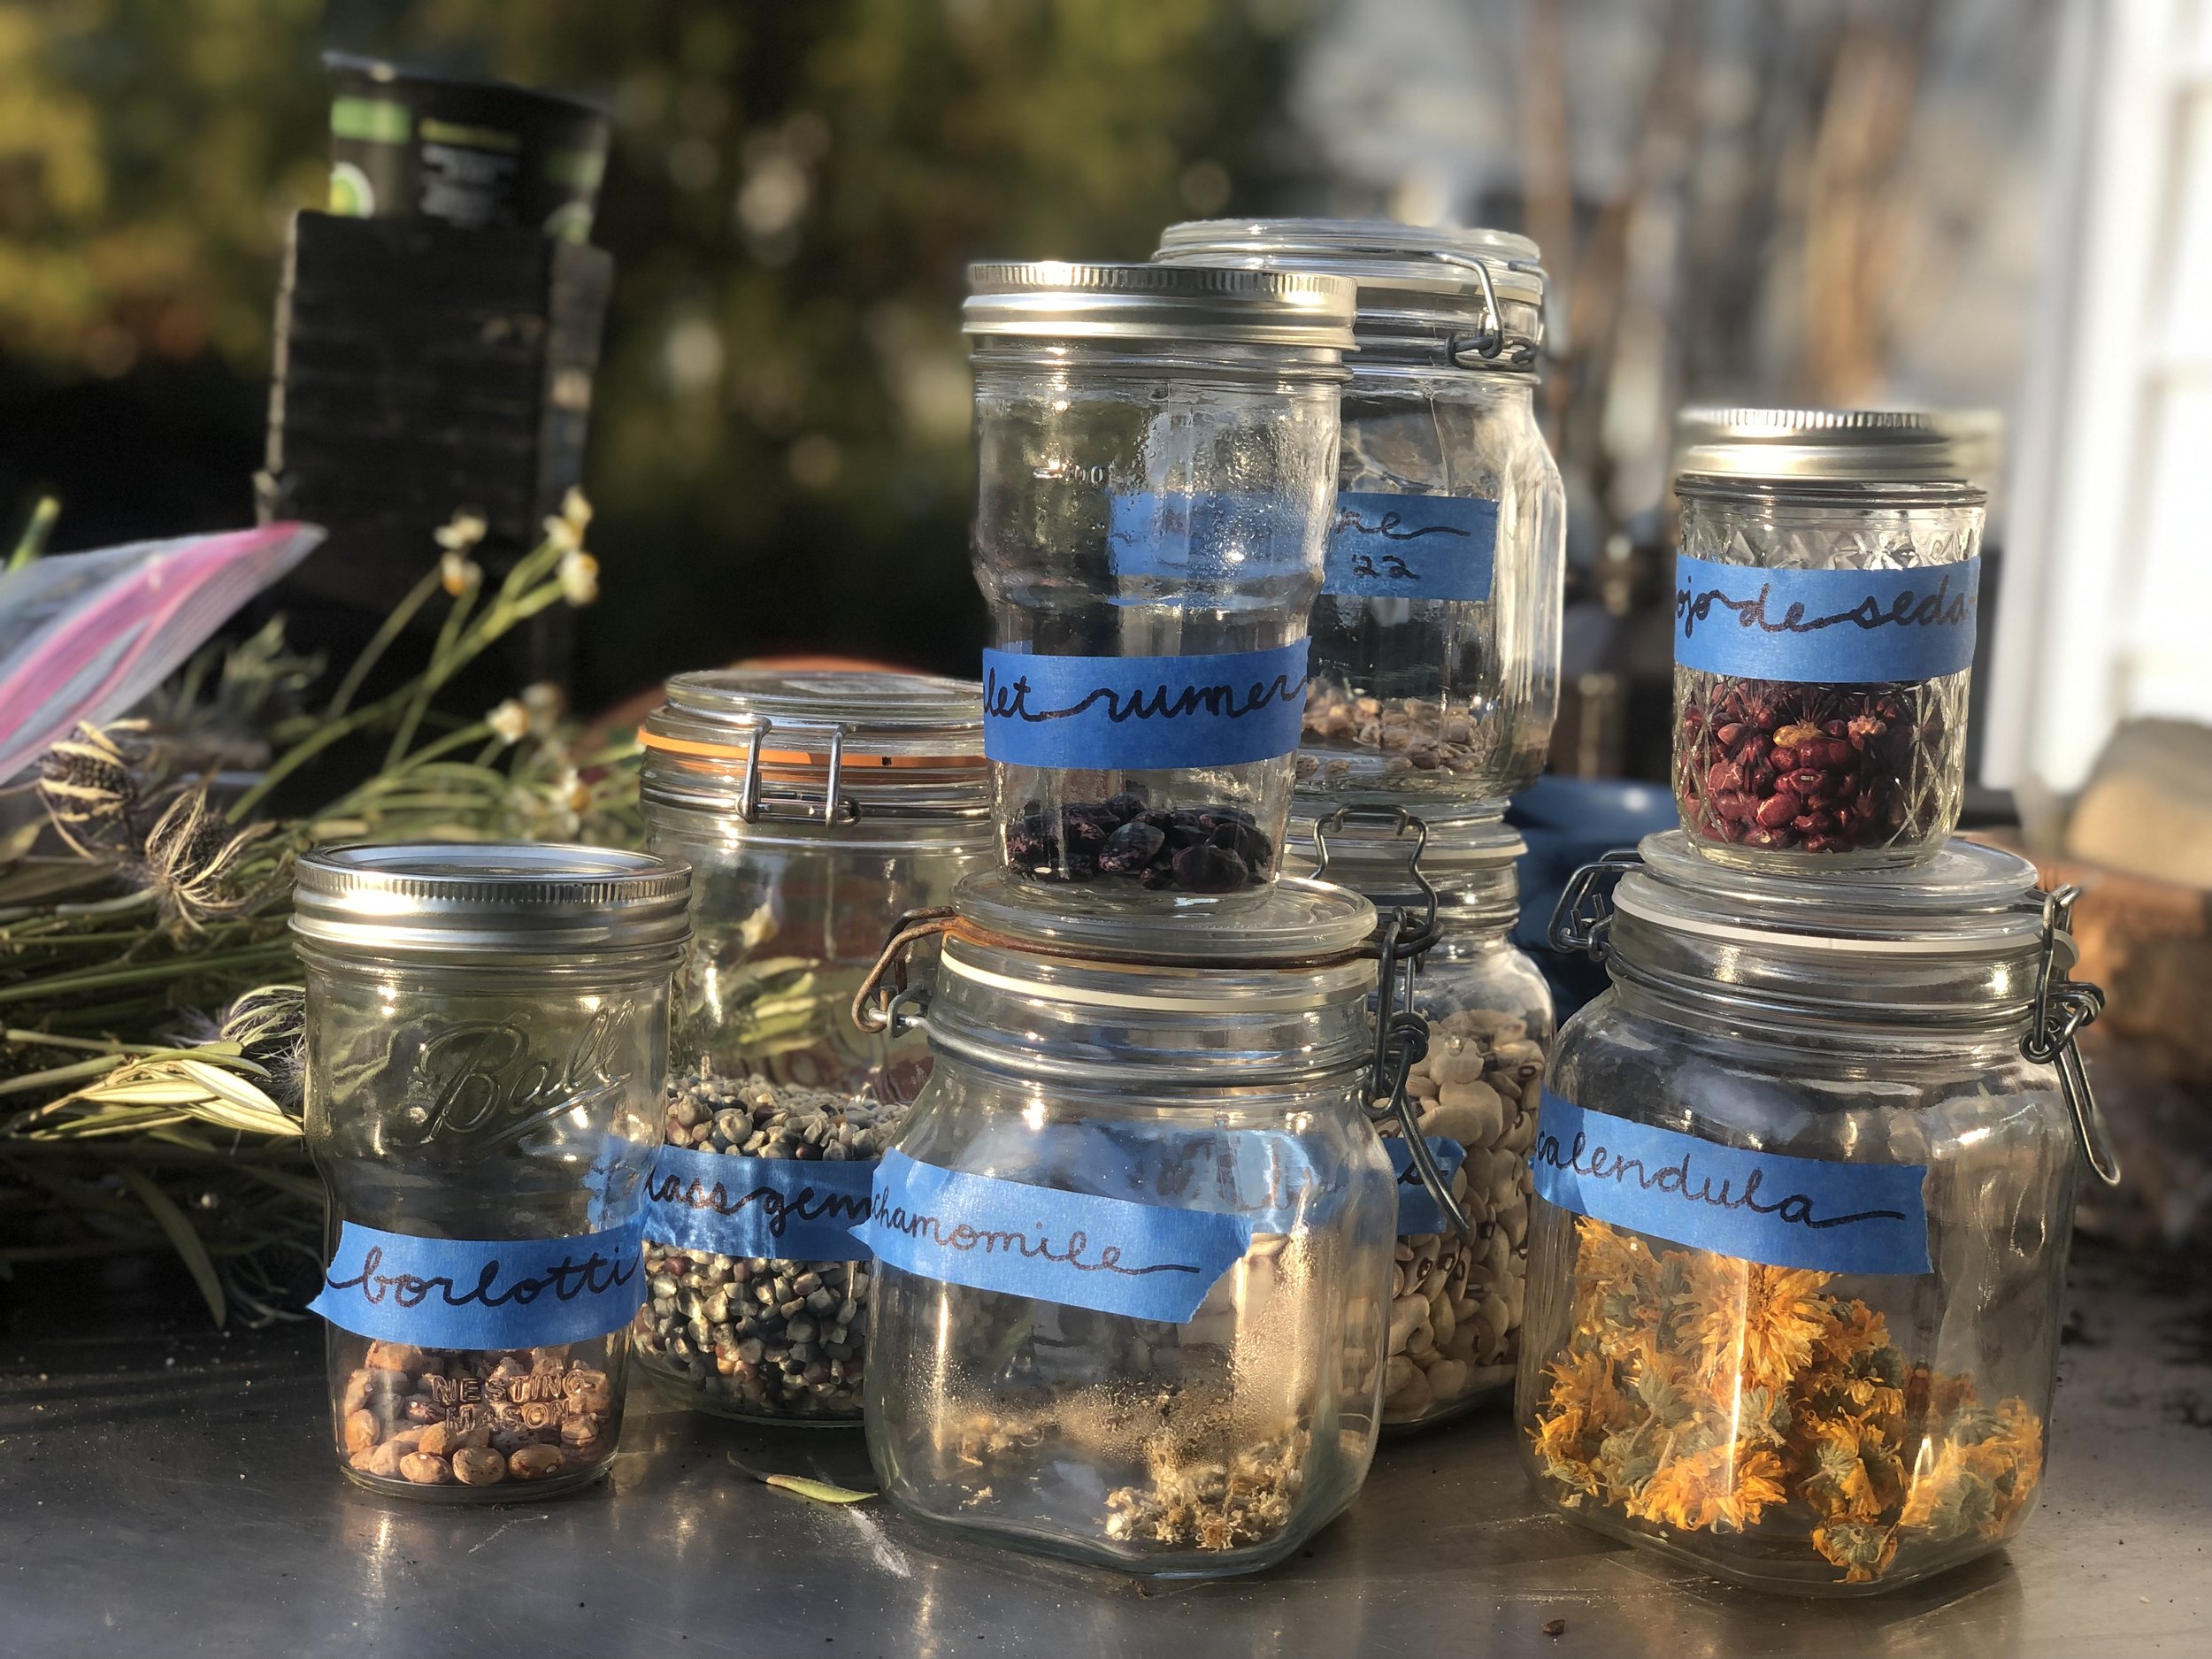
  • New dry beans to try out

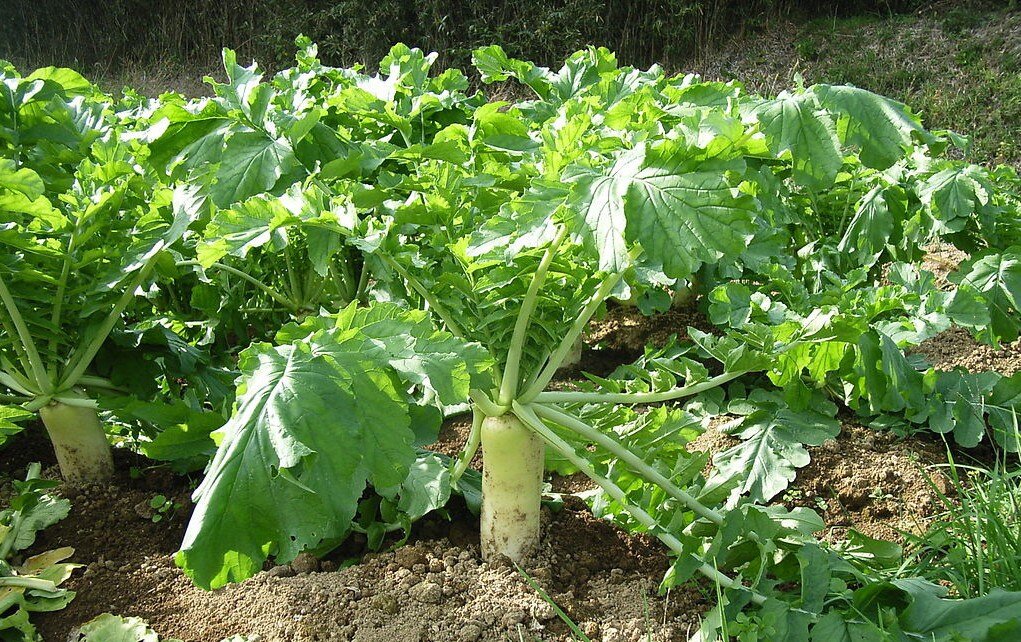
  • Getting the timing right on fall brassicas

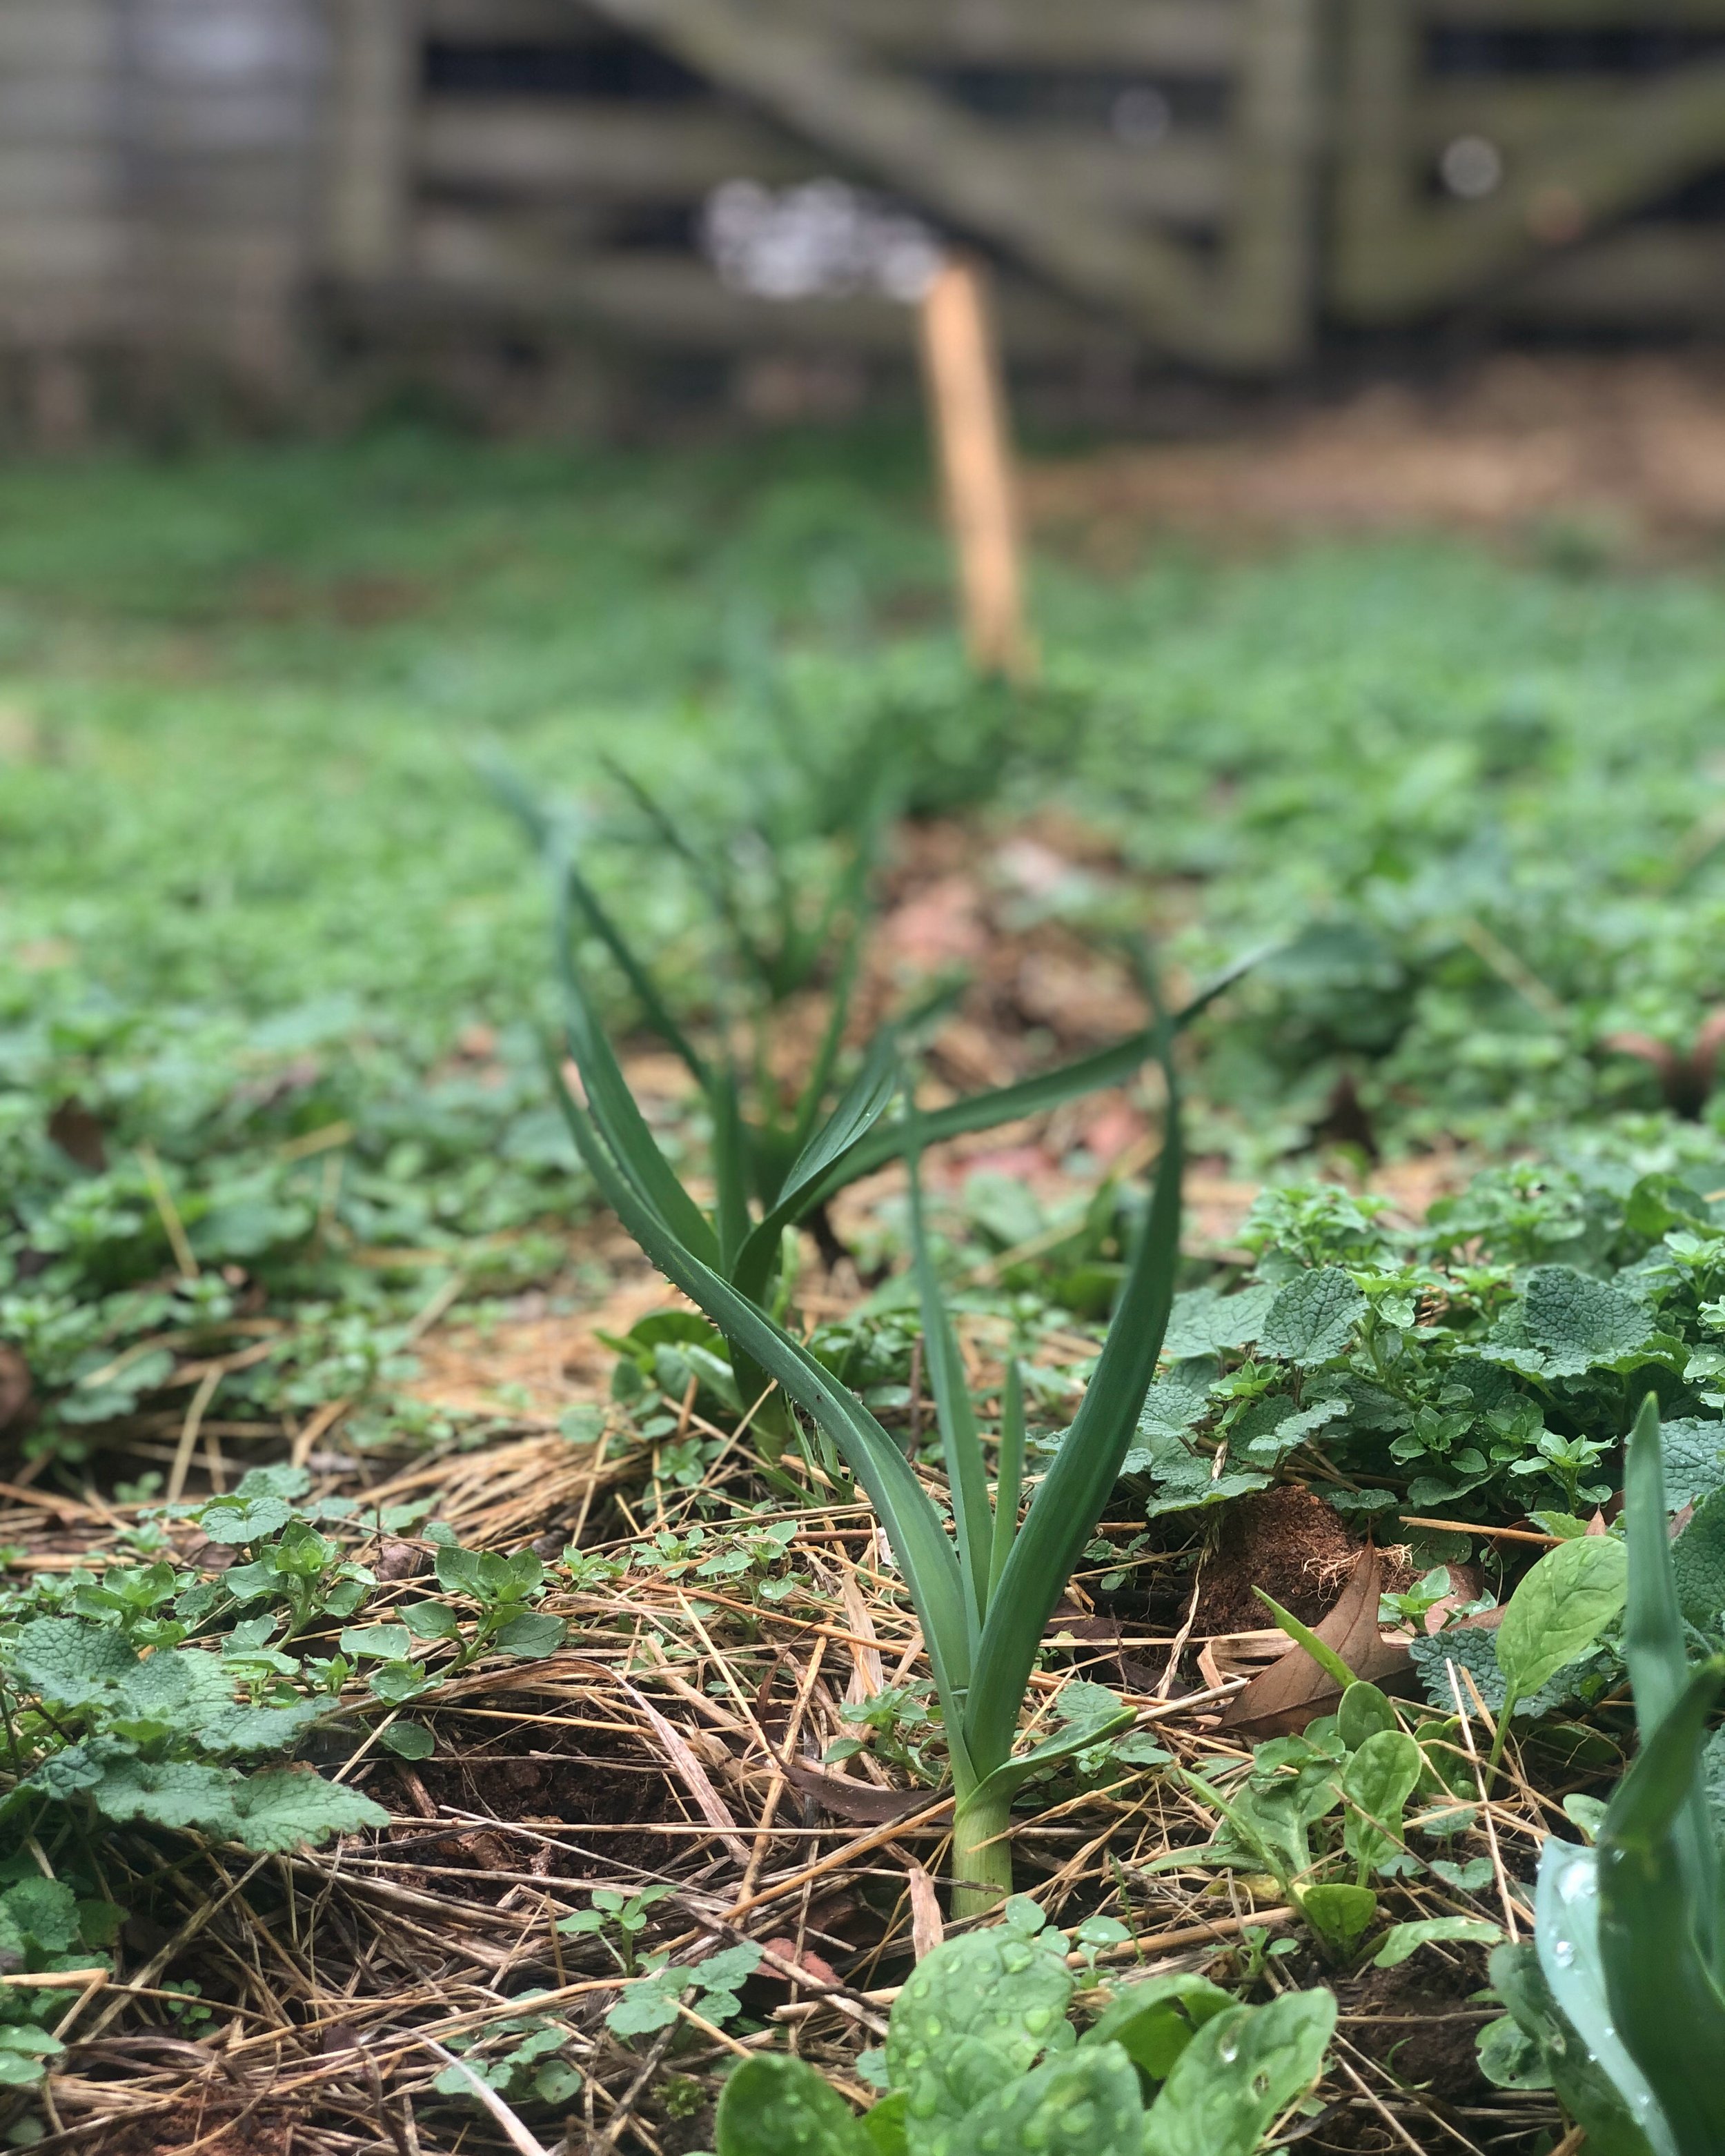
  • Overwintering frost hardy flowers for early spring

  • Celery

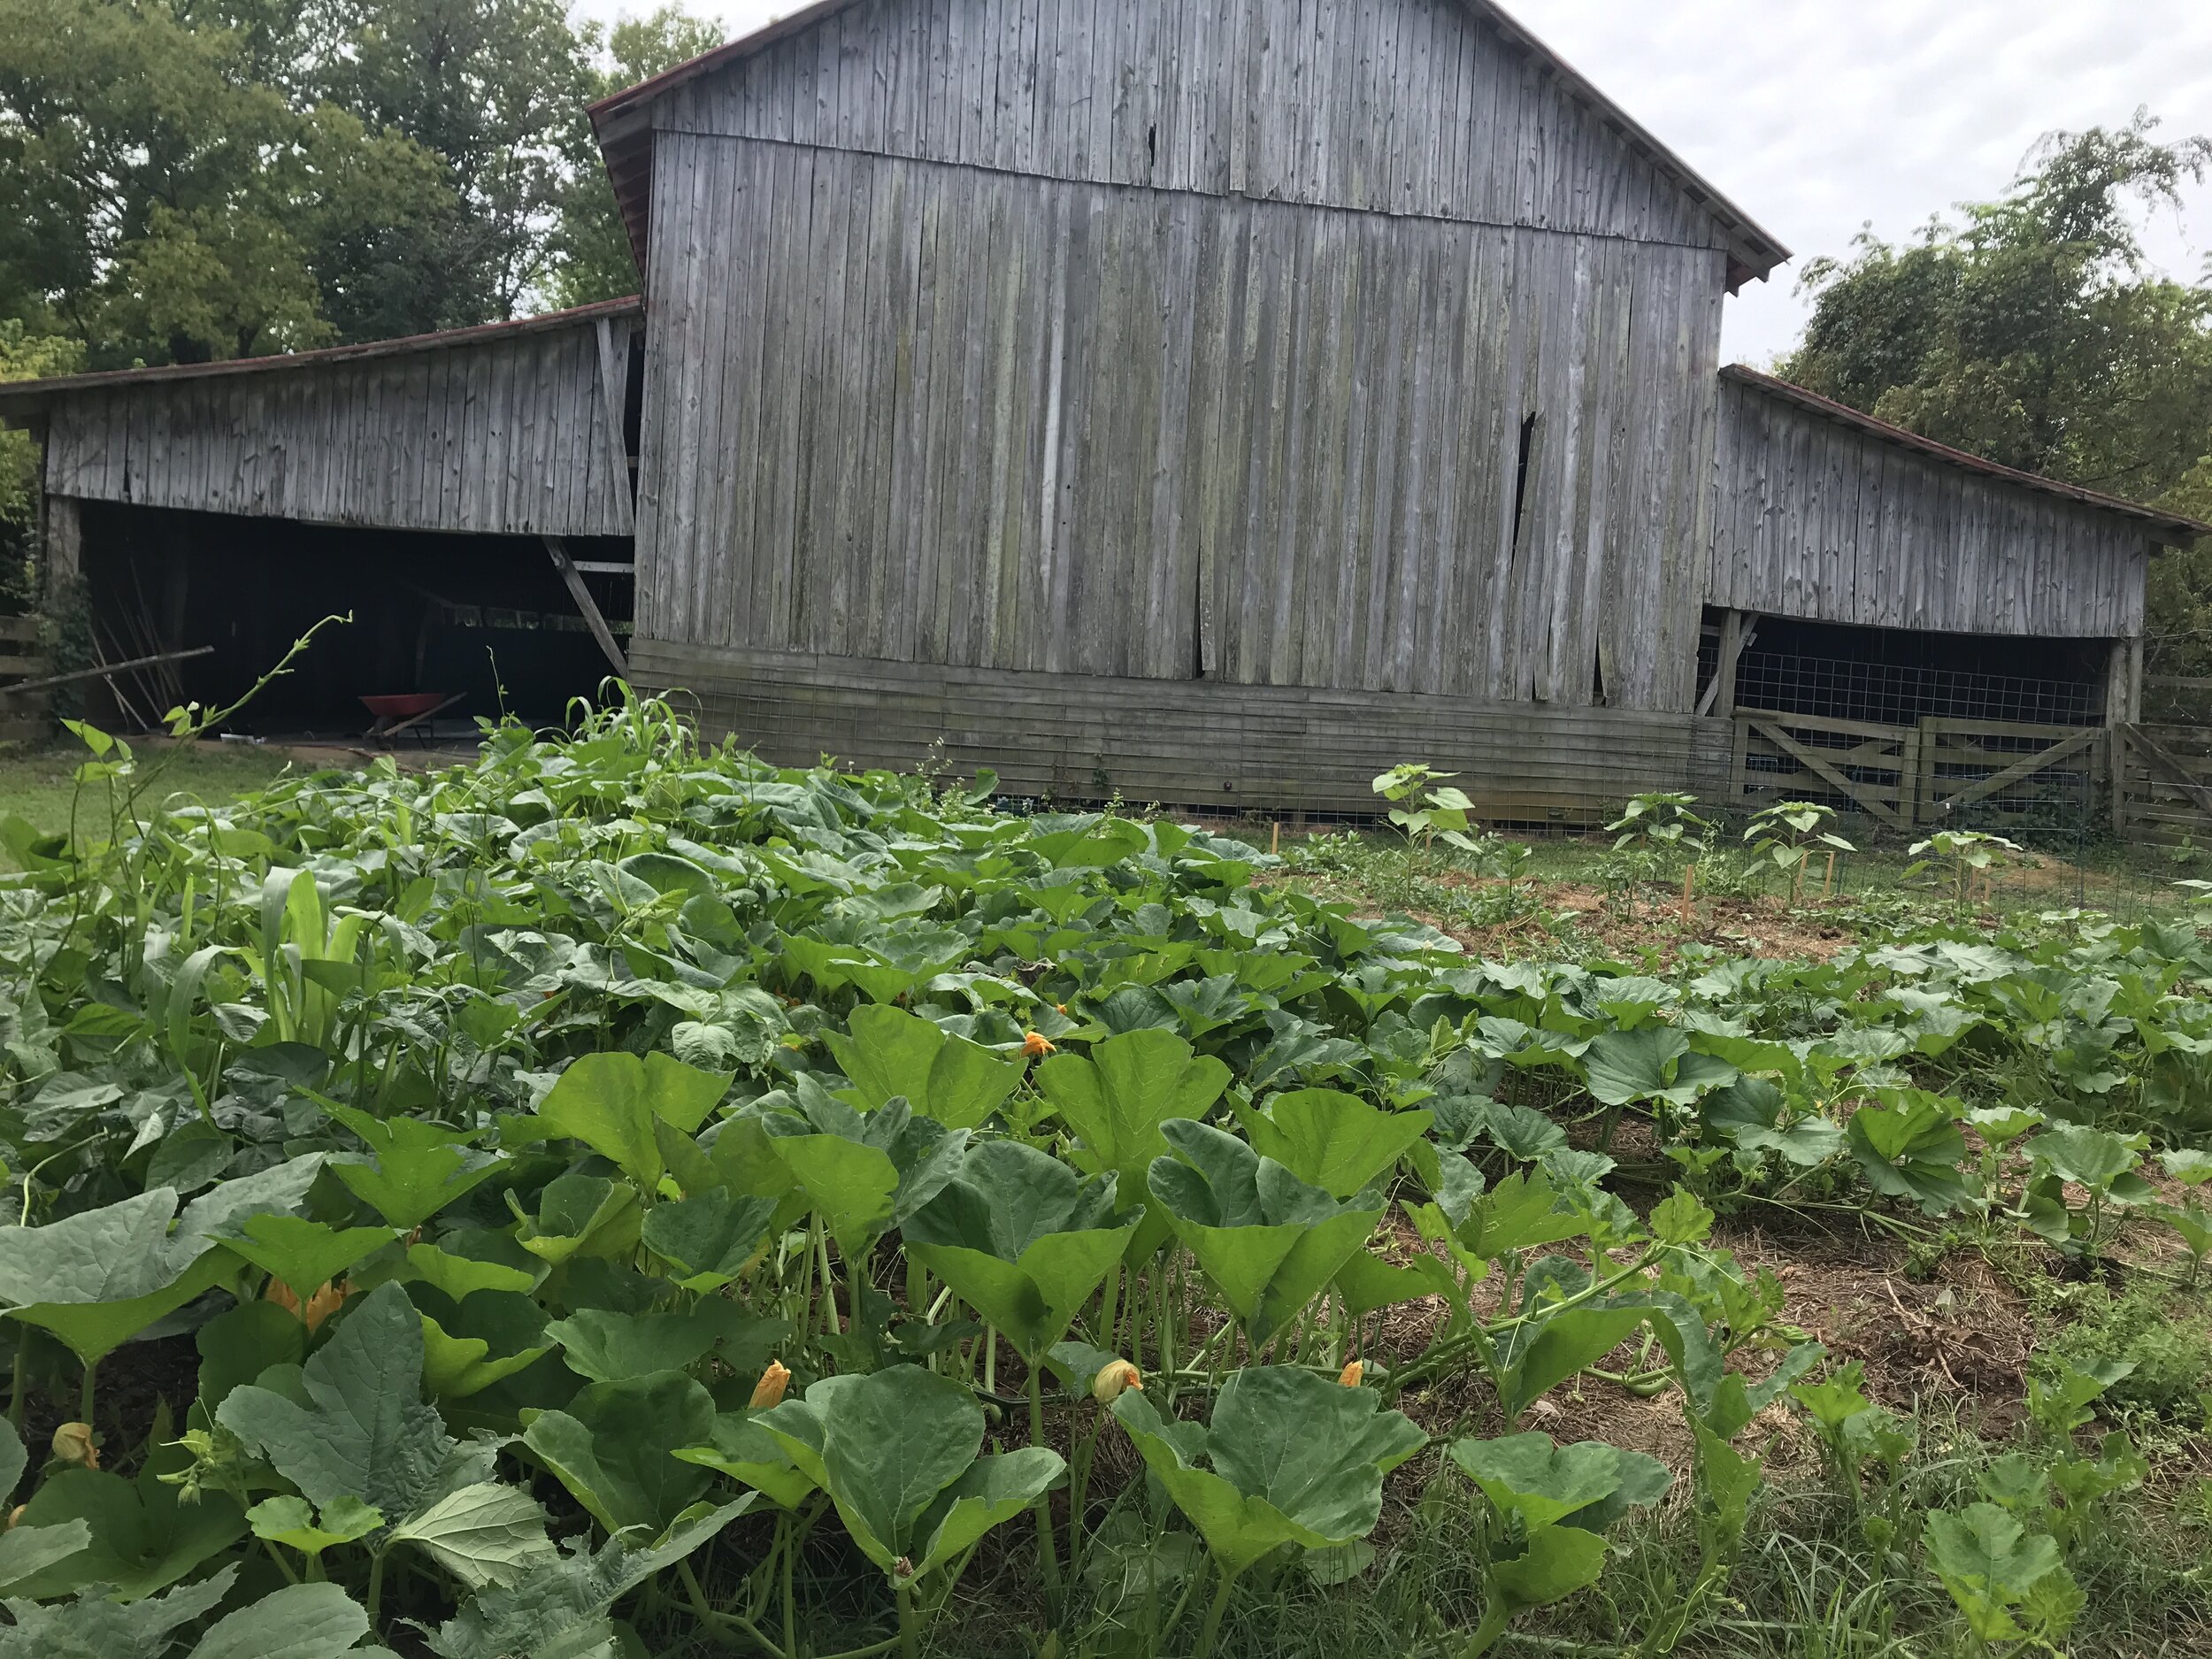
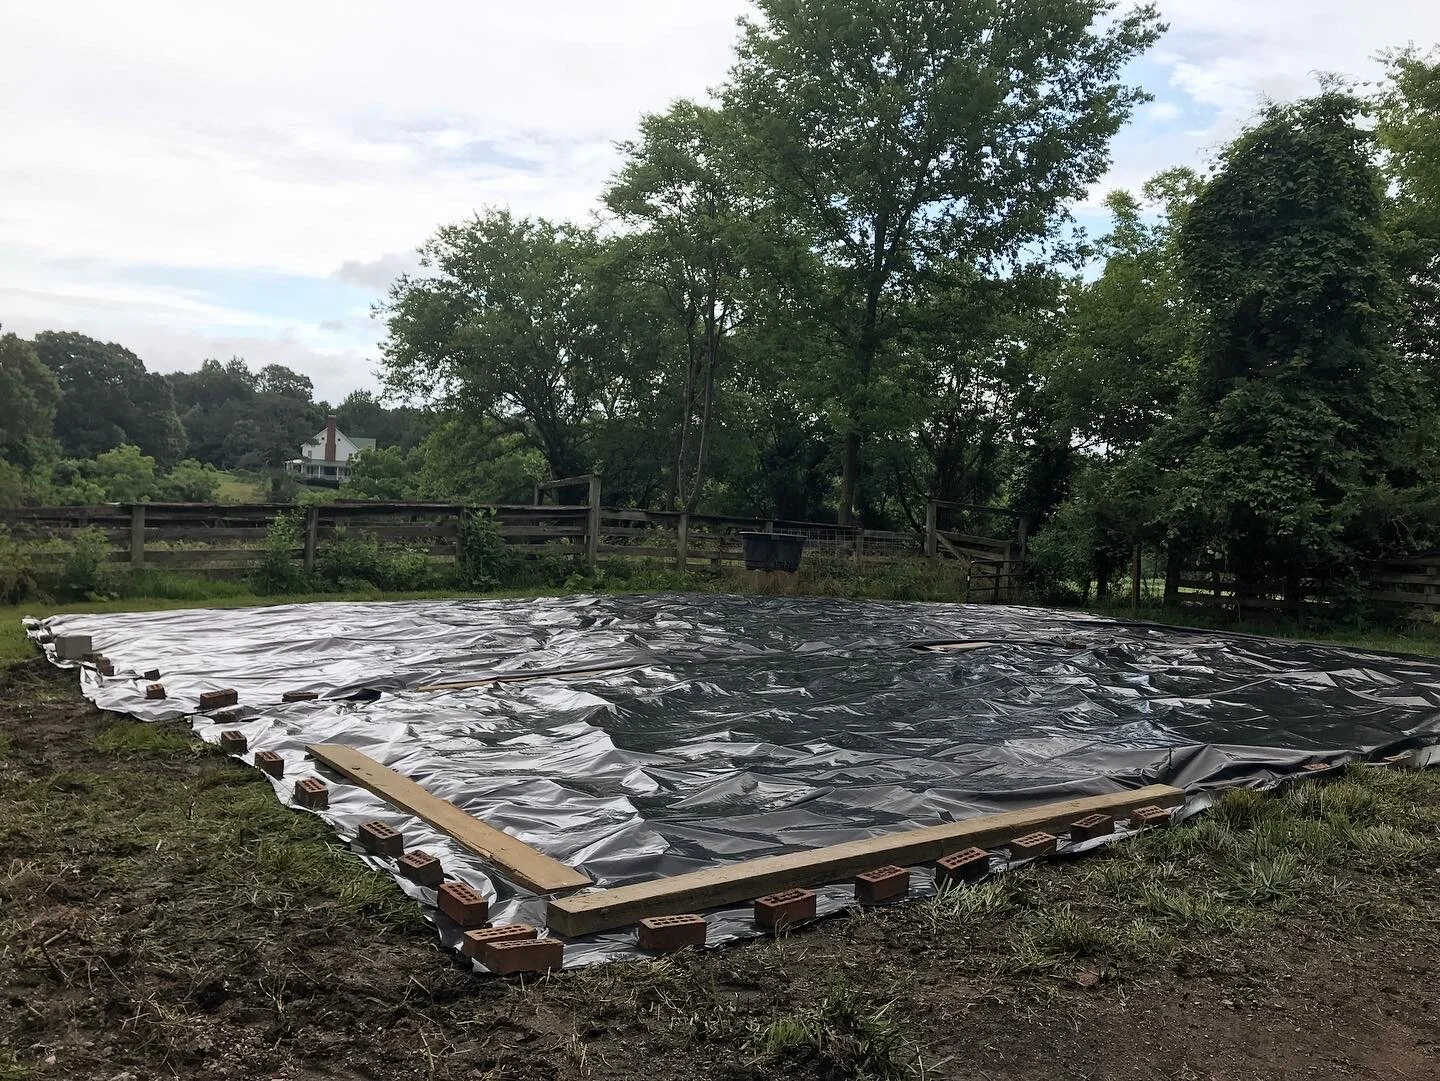
  • A whole new garden - this time much closer to home!

It’s April as I’m finally getting around to this final update from 2022 and I’m getting back into the thick of a new growing season, so this will be a image rich (explanation poor!) update on last fall/winter:

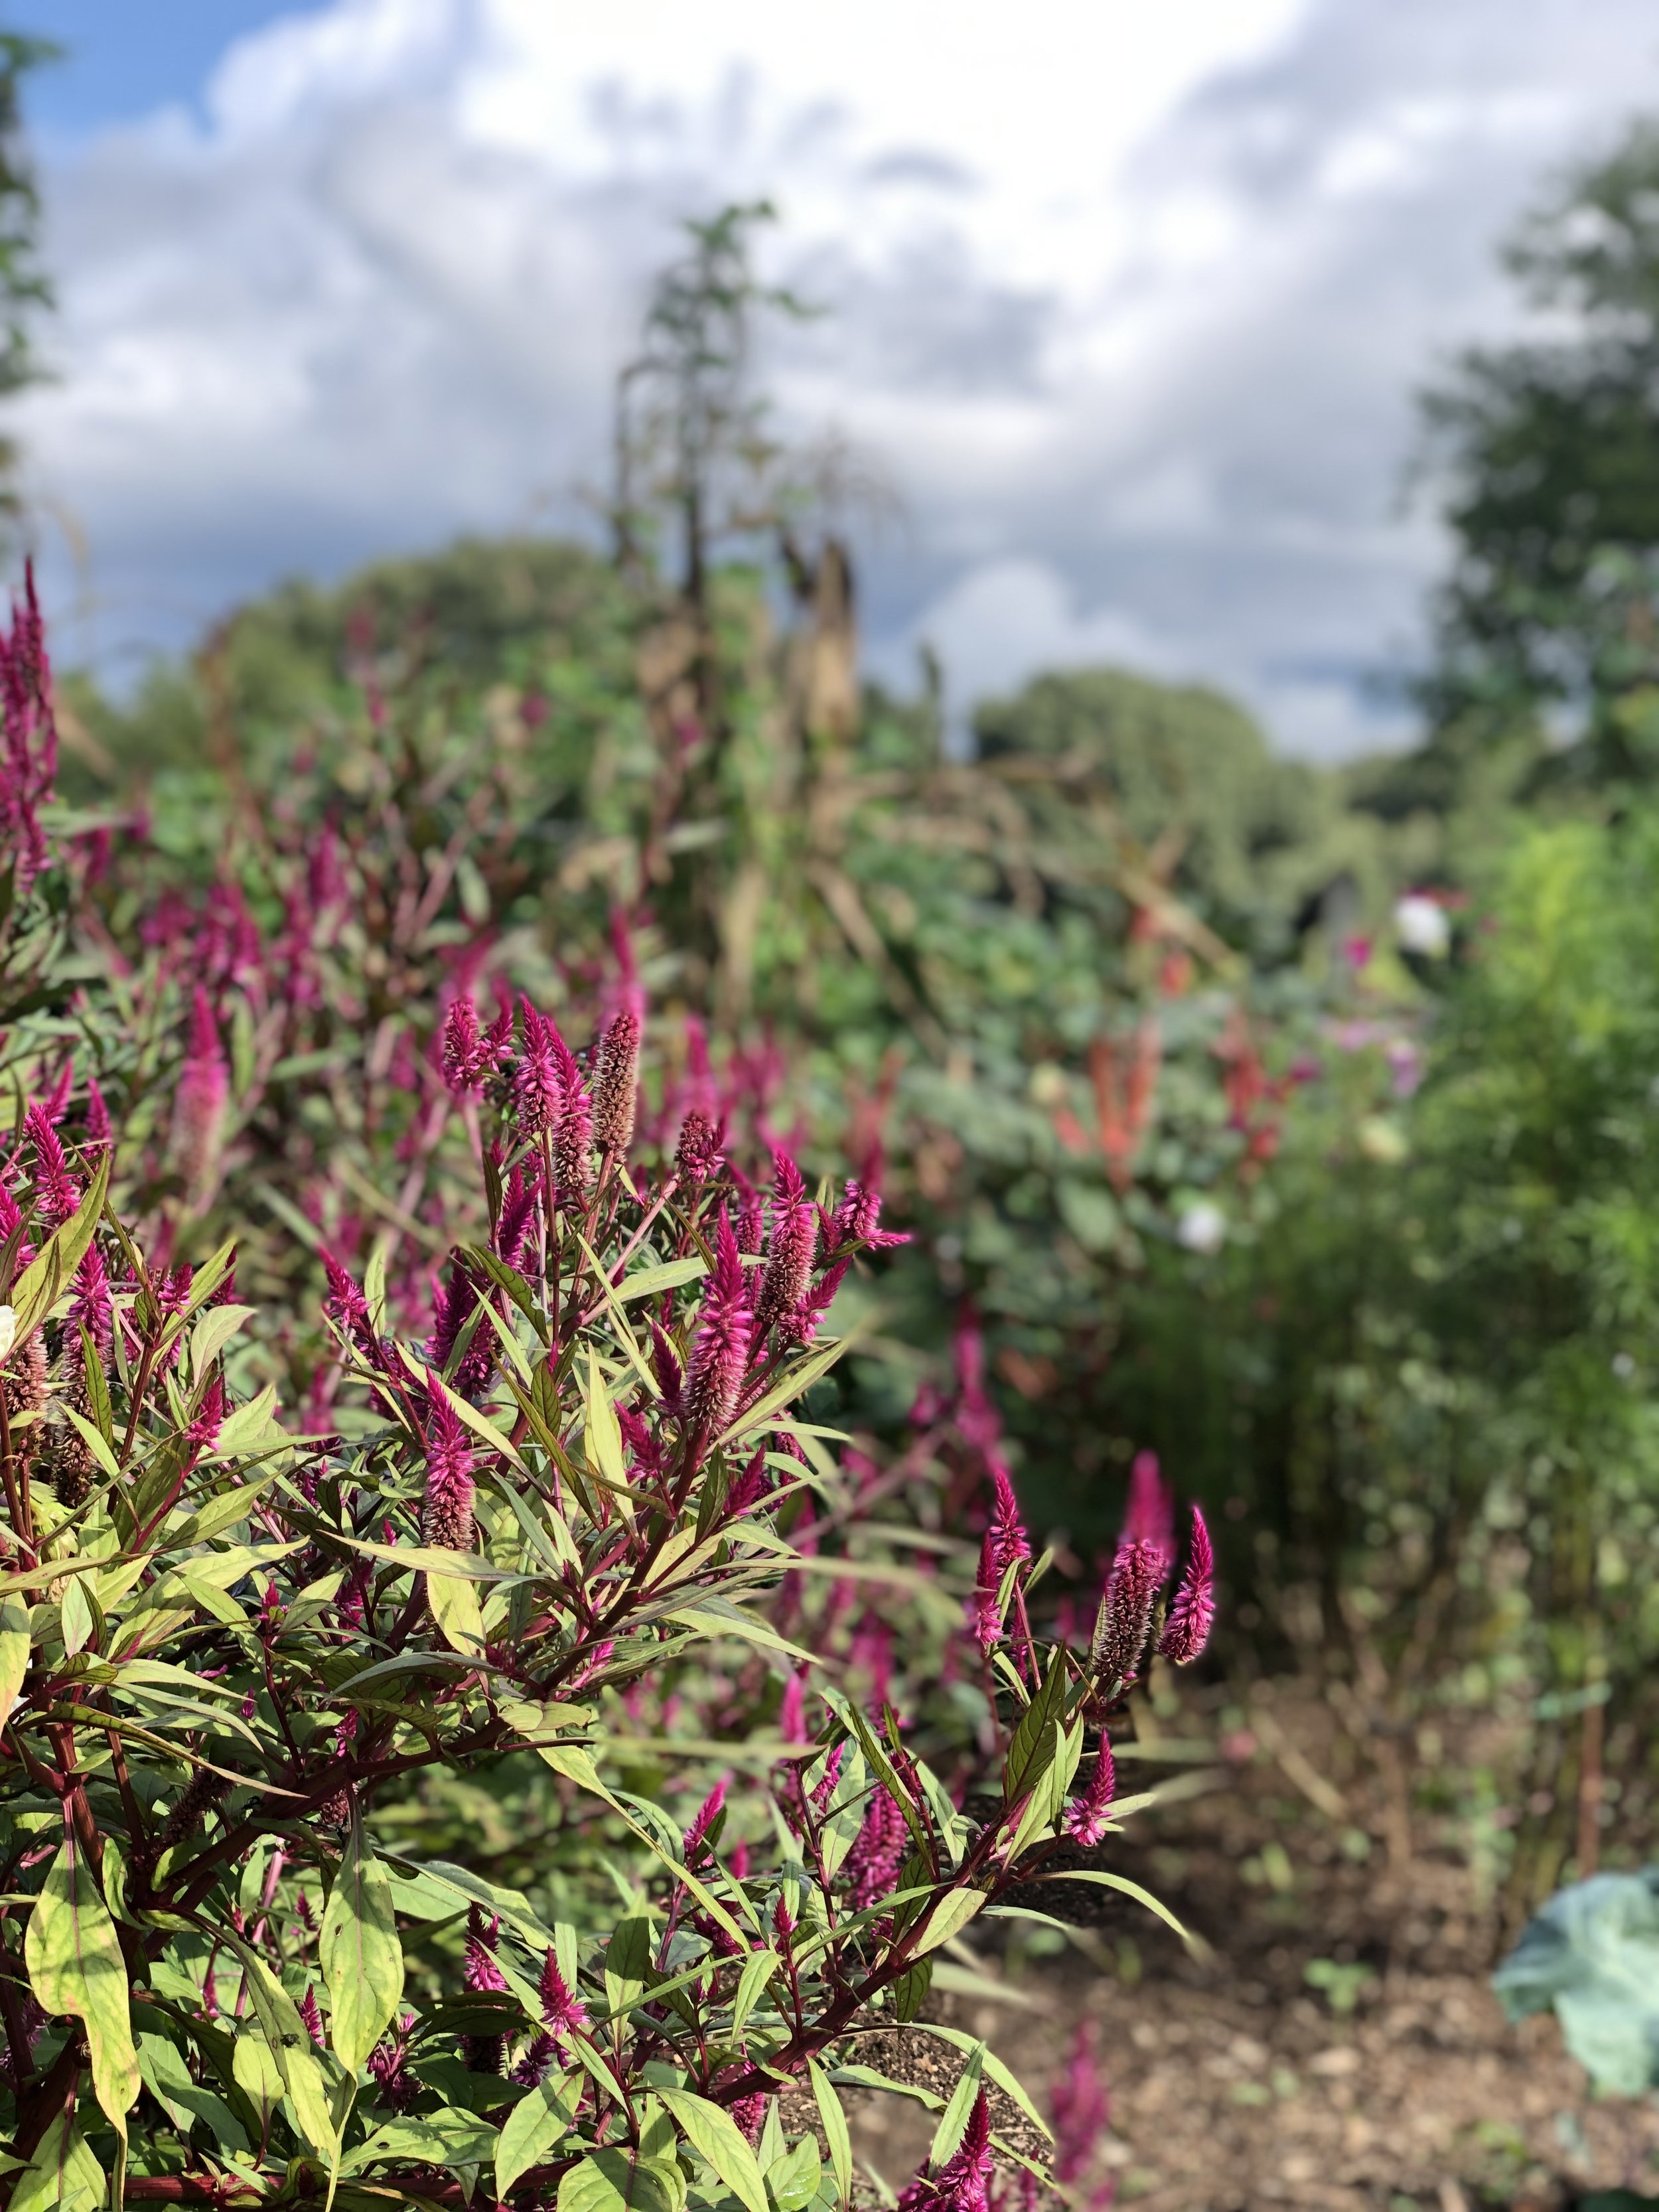
A big bee favorite: celosia!

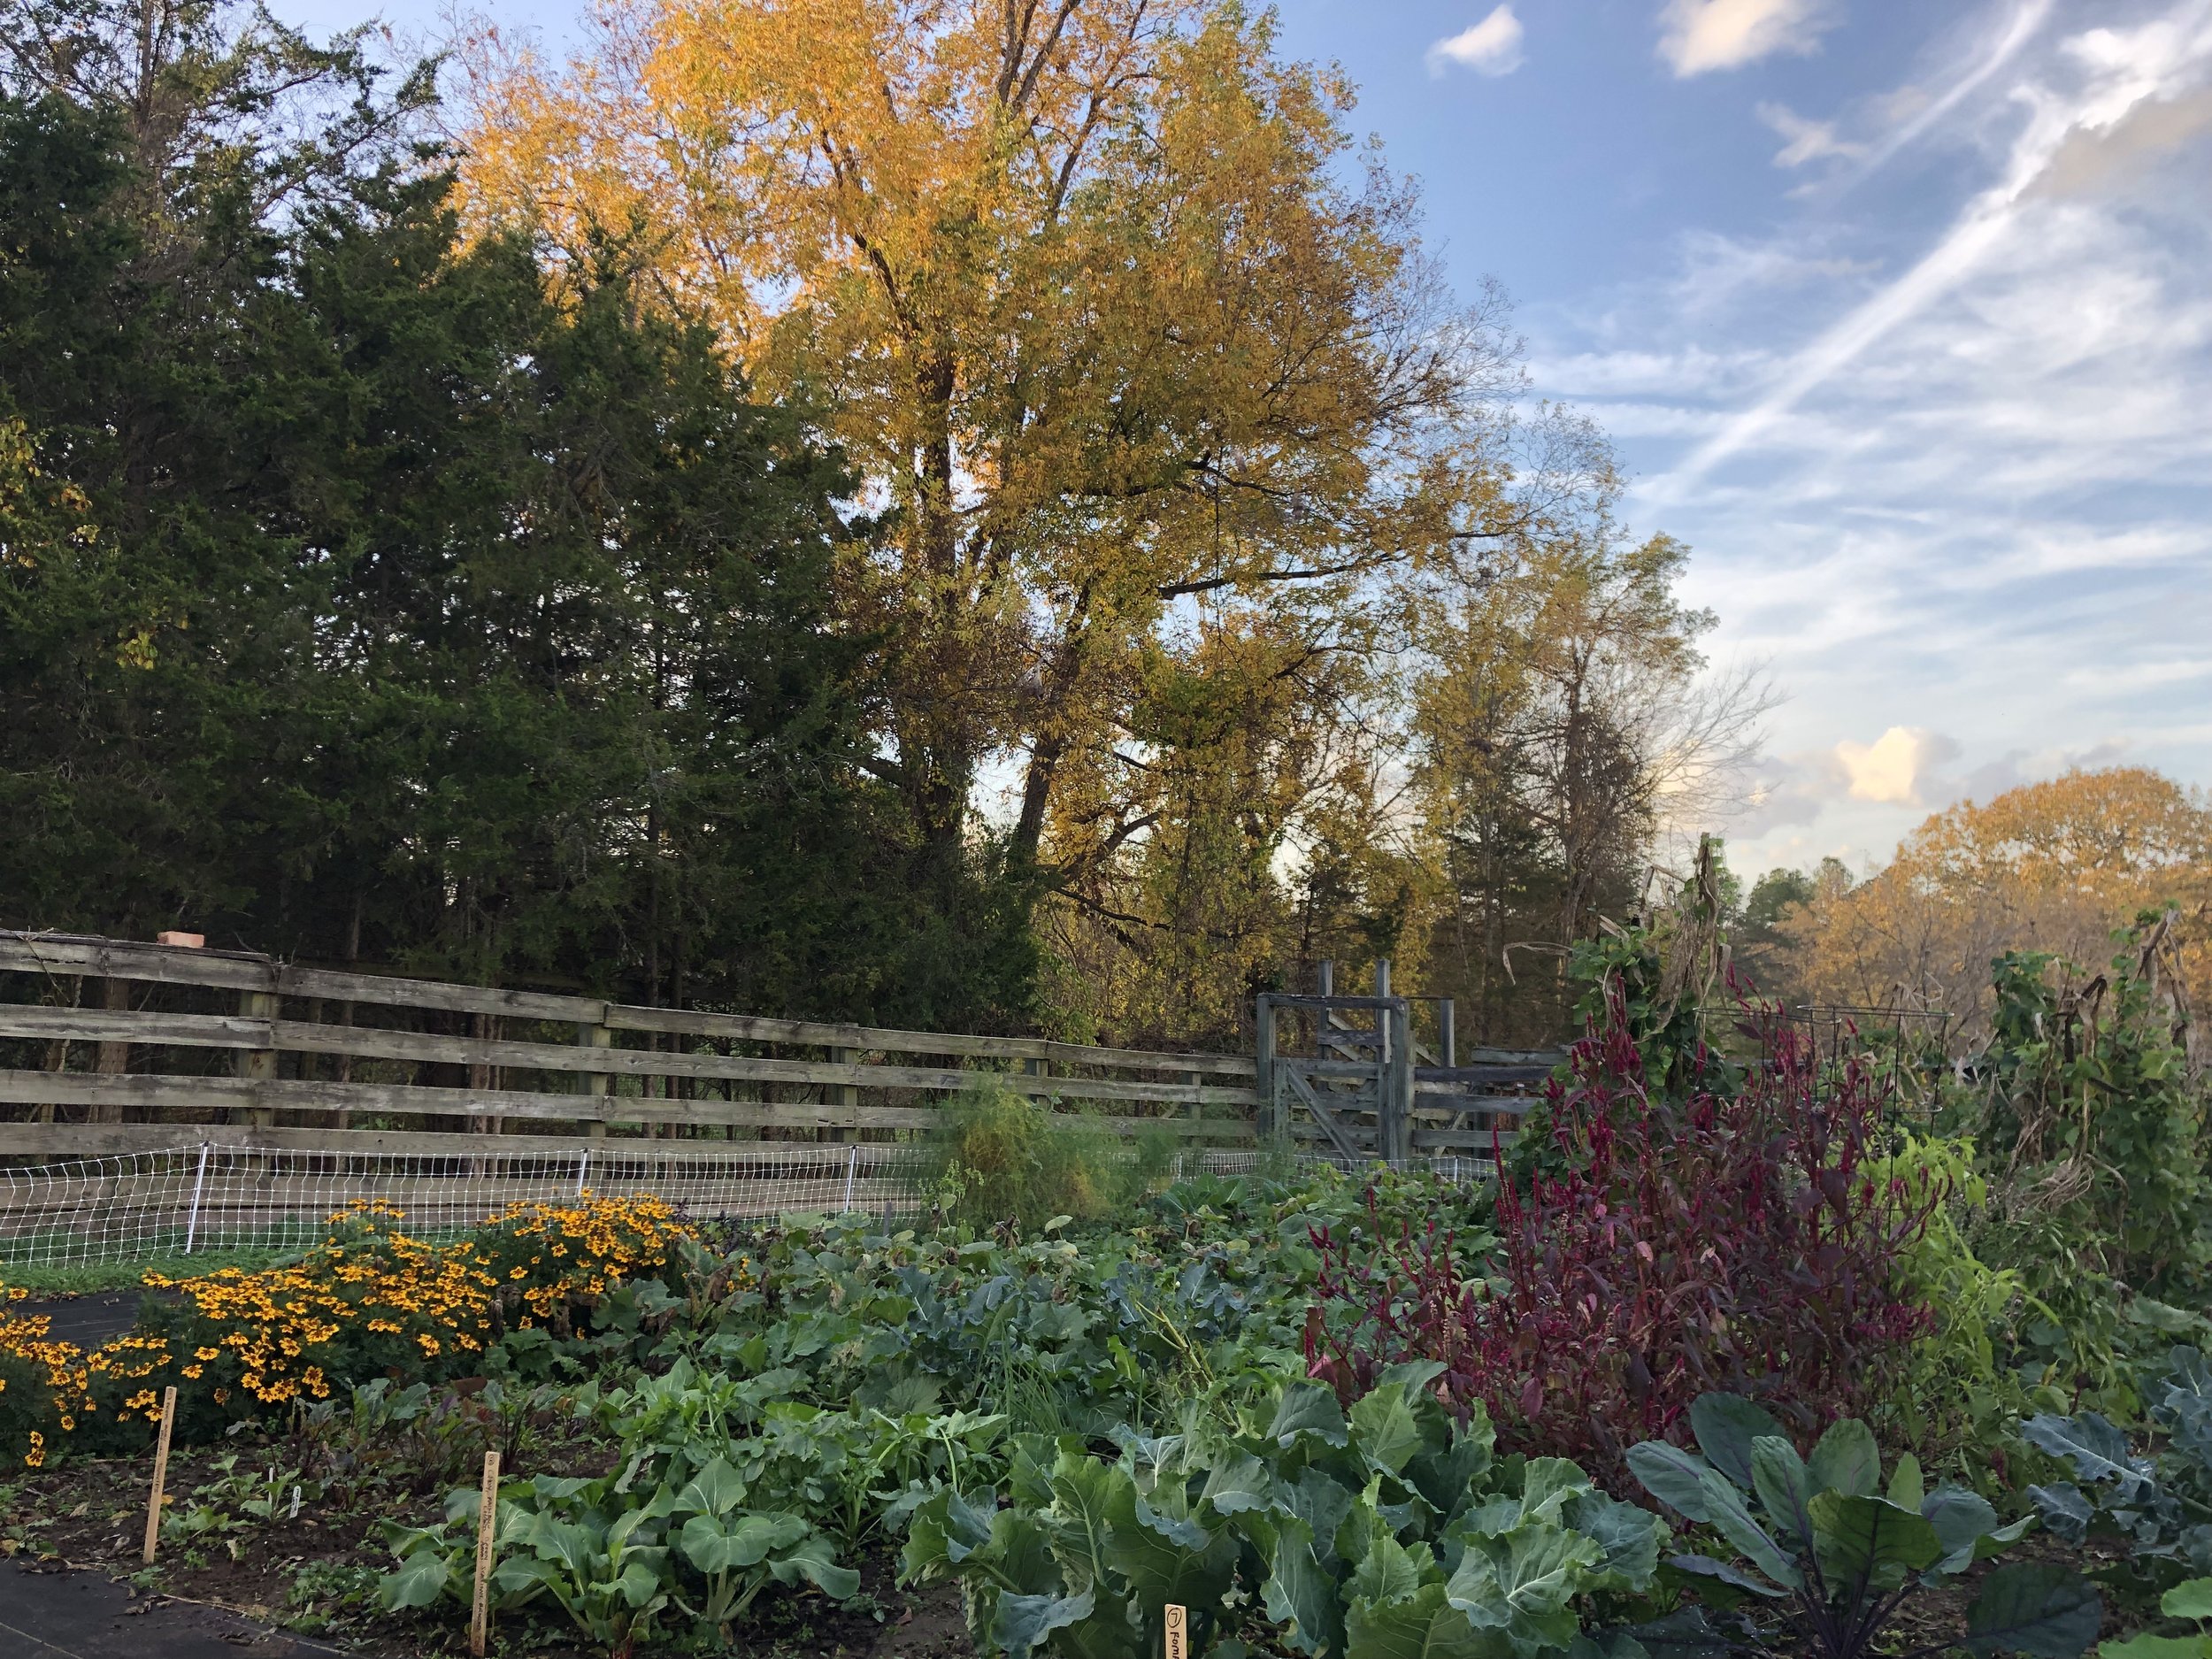
We had a very light frost in early October, then were able to get 4 more weeks of mild fall weather. This photo was taken on Nov 5th.

…and a very similar view on Nov 26th after a hard frost. Nothing like cold temps to bring the garden back to horizontal!

By late September, the first round of quick bok choy was ready to eat!

I got the hang of transplanting several successions of baby boy choy (like this round that I harvested close to Halloween), so that we were able to eat it in stir fries through out the fall.

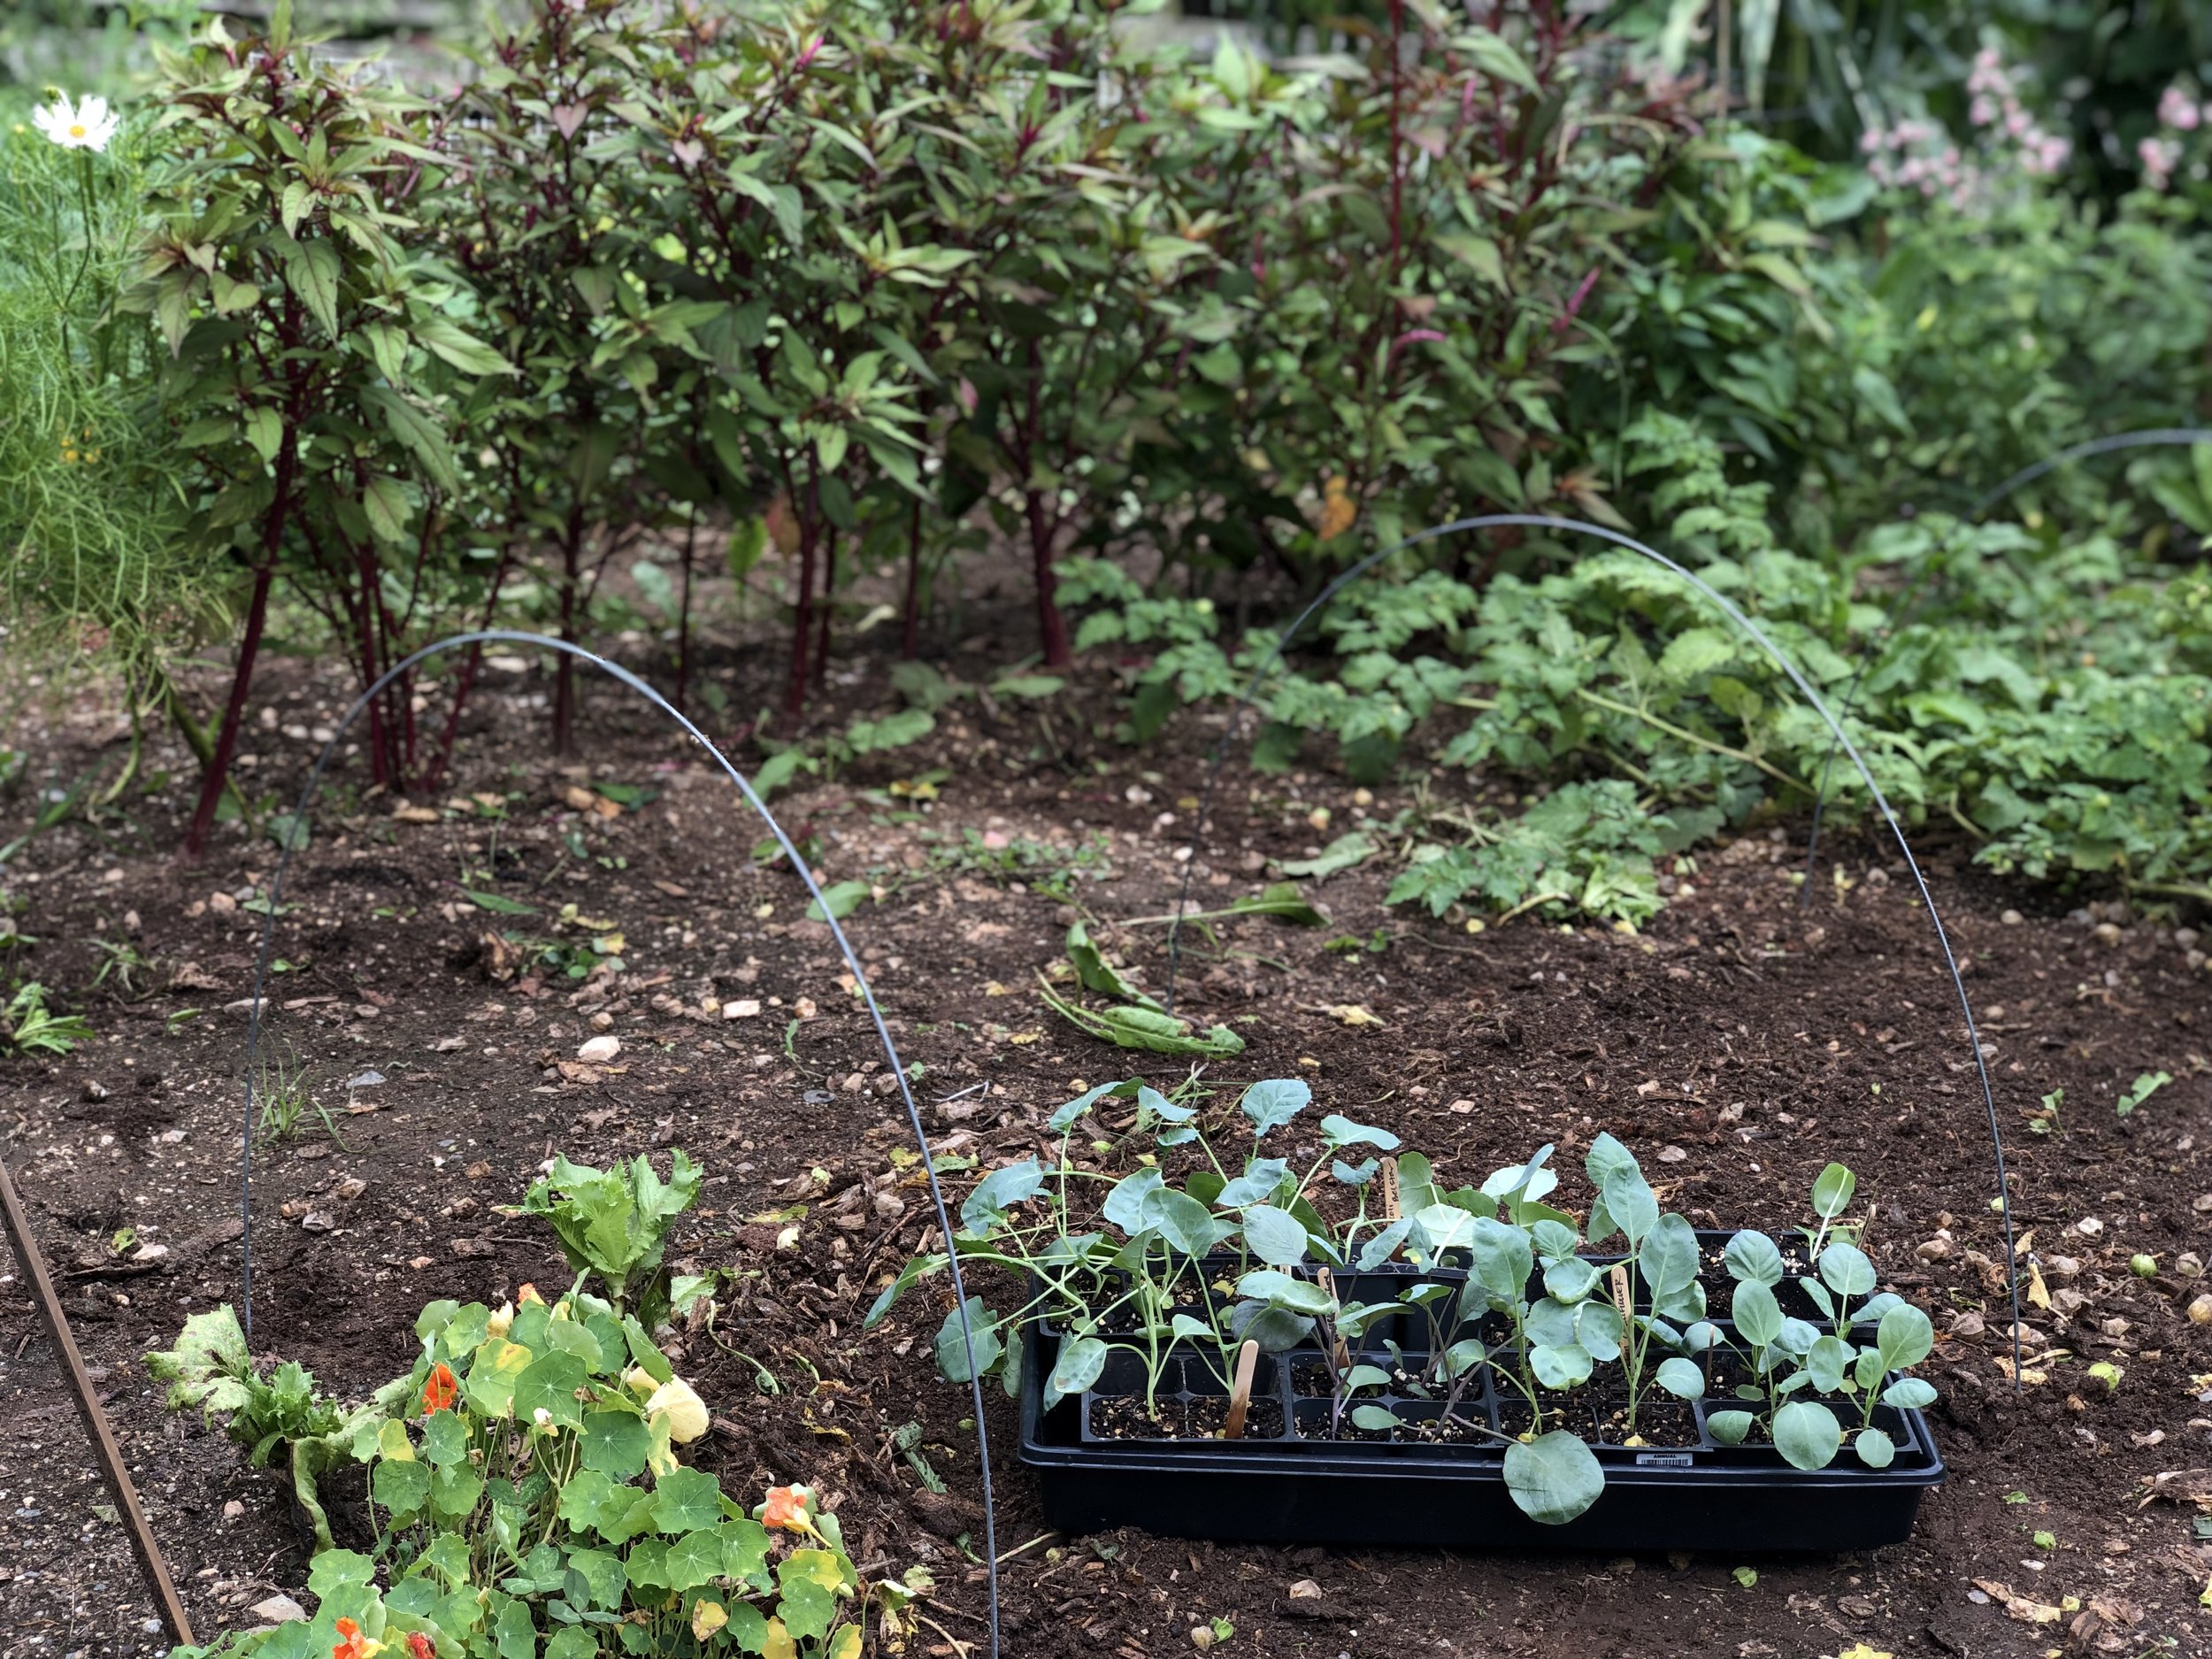
Next, the slower brassicas started filling in by mid-November, including Belstar and Green Magic broccoli

…plus my first times successfully growing cauliflower and romanesco!

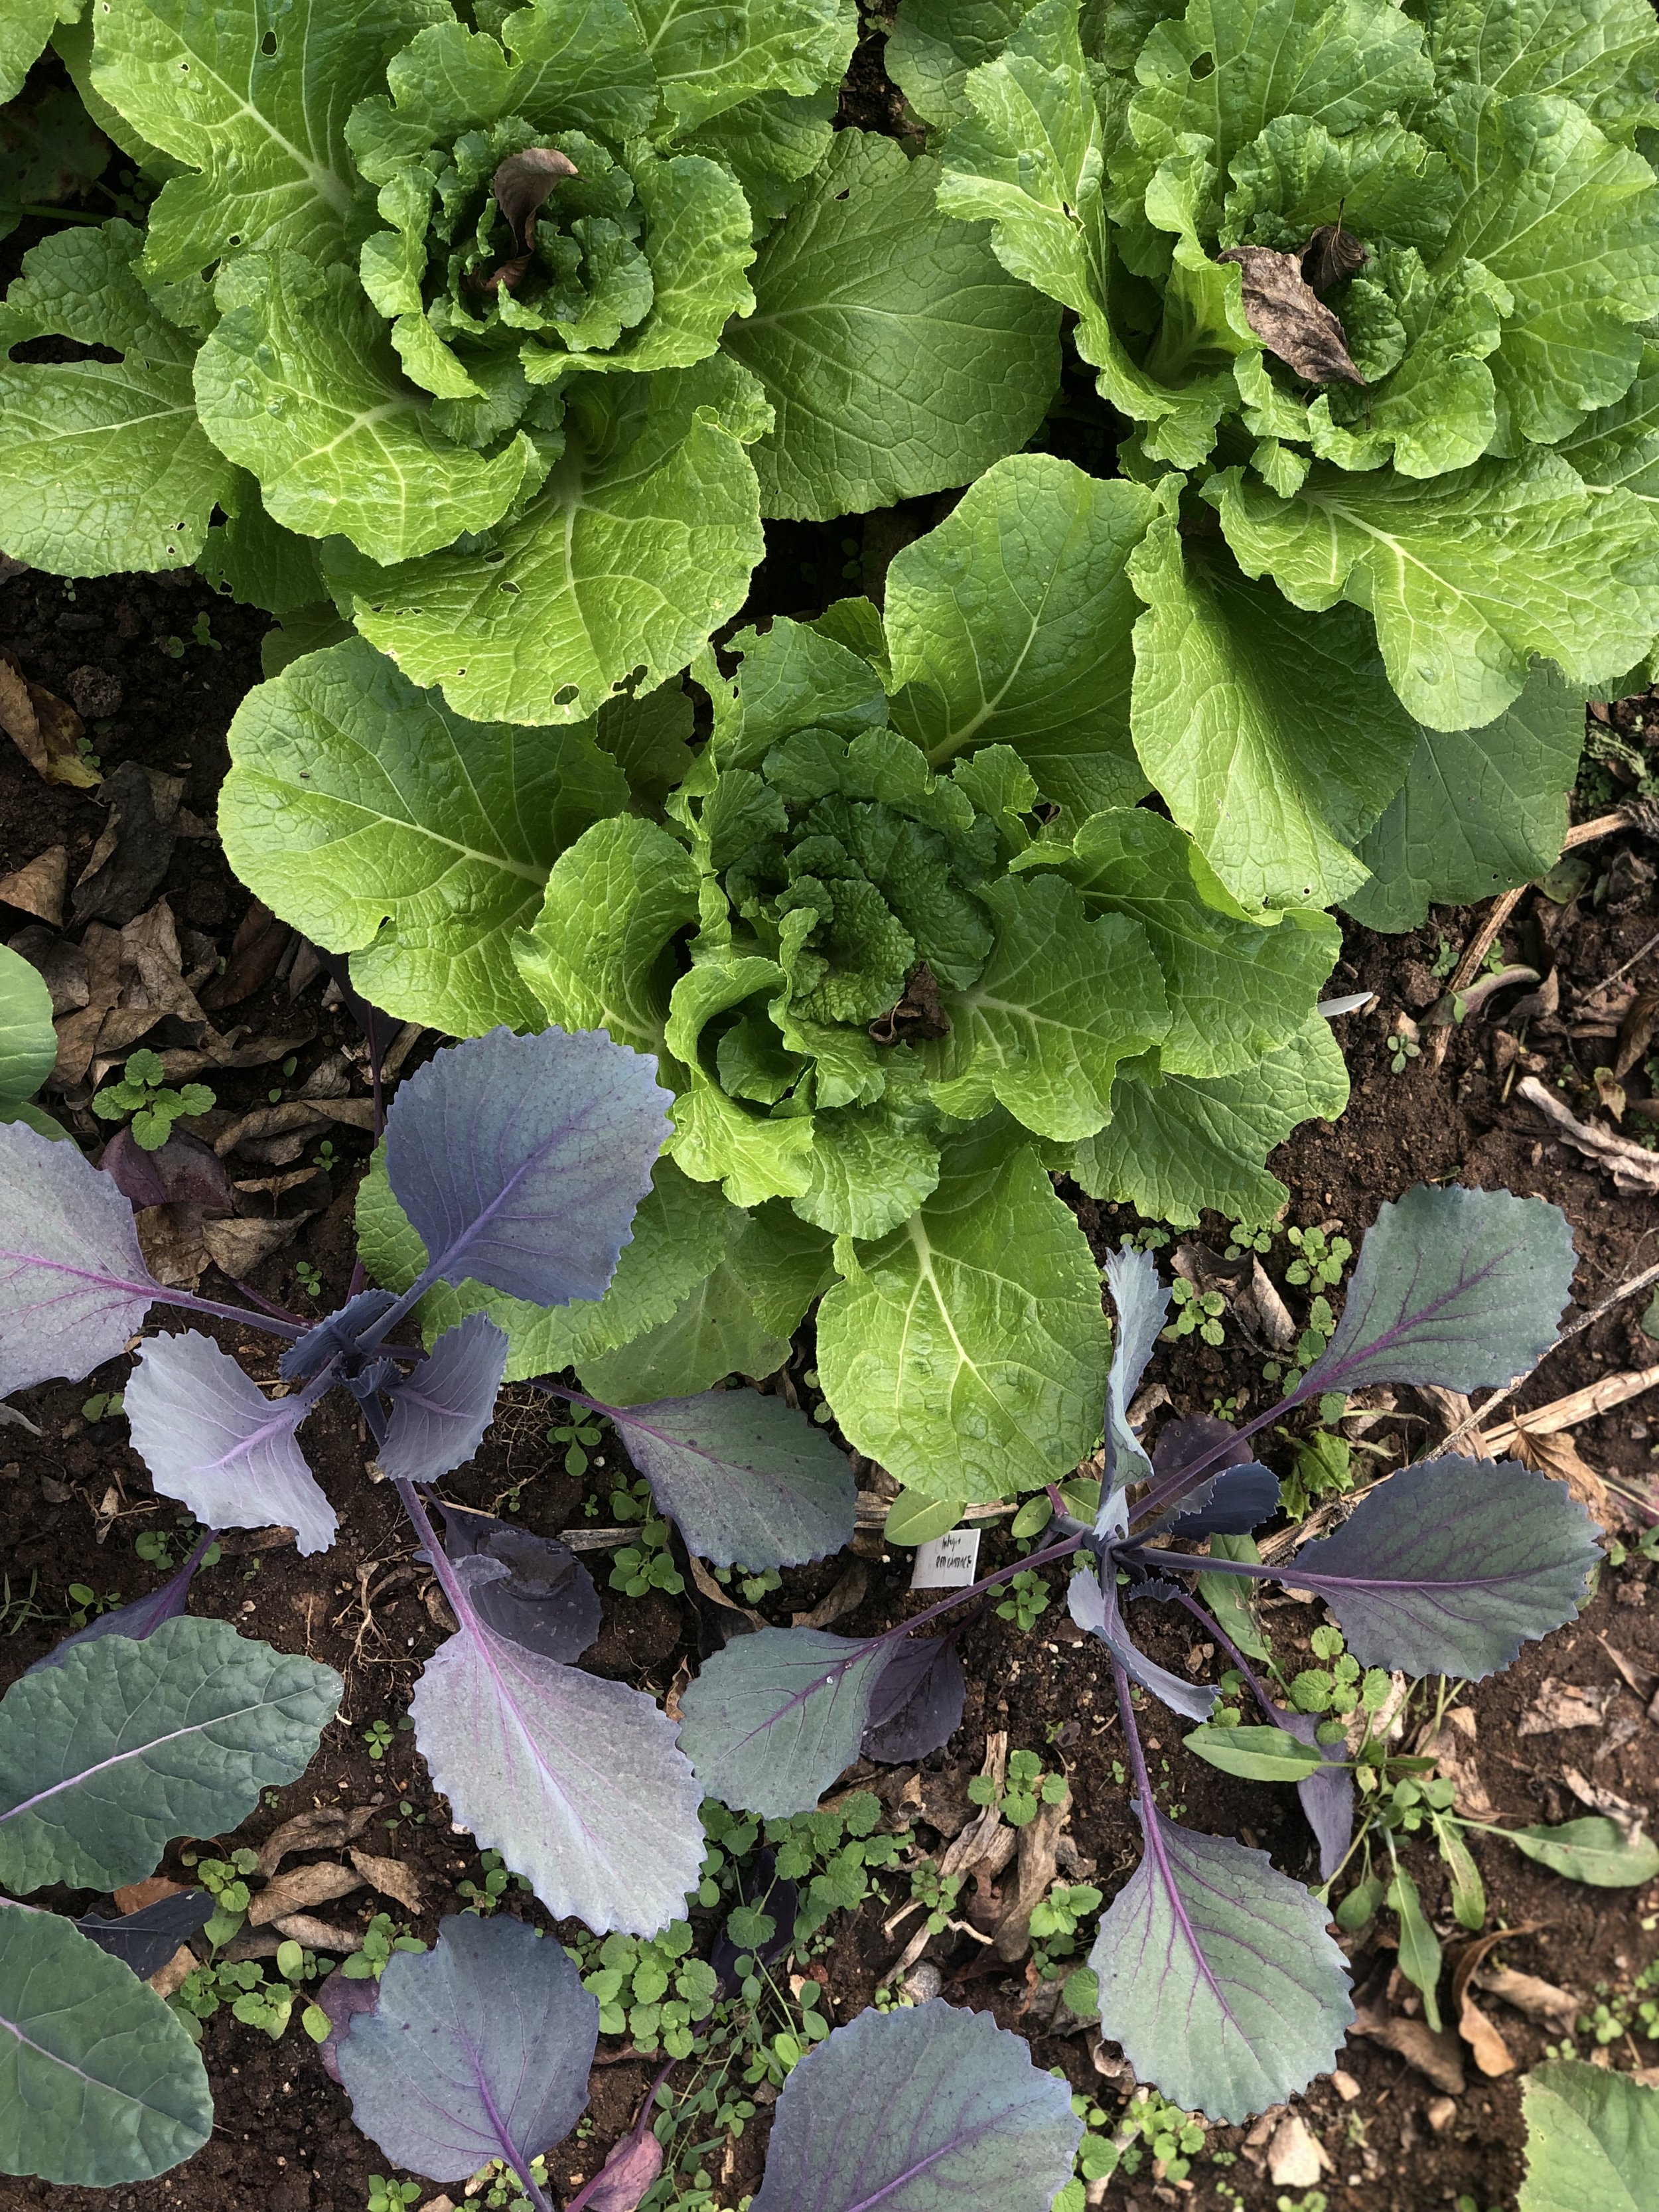
We harvested half of the Napa cabbage before the arctic blasting deep frost of December. The other cabbages, including the red cabbage in the bottom of this photo) stayed in the ground to overwinter and finish developing in early spring.

Dill, parsley and celery - harvested for Christmas!

In early November, I pulled back the silage tarp to check on the progress on suppressing the grass. I ended up feeling like the debris there was still too tall, so I brought the mower back to cut it down closer to the ground before replacing the tarp.

Starting to be able to see it as a canvas for future veggies and flowers!

2022 Growing Recap: Summer

I’m continuing my very delayed recap of the last growing season—trying to remember all the disparate lessons from failed experiments and useful changes I made this past year.

New projects in Summer 2022:

  • Cucamelon vines

  • Ground cherries

  • Sweet corn

  • Greatly expanded flower variety

  • Fiddling with winter squash planting times

  • Previewing a whole new growing space

Chard (and especially “Perpetual Spinach” variety) was a cornerstone of early summer before the larger tomatoes and big harvest of green beans got going. I had had bug damage early on with the chard, but once I thinned out almost a 2/3 of the plants, there was less hiding space in there for grasshoppers/crickets and I think the birds took care of that problem.

One game-changing backbone to my growing year was my monthly volunteer days at Shalom Farms where I learned a tremendous amount about harvesting leafy greens (for example, banding them in bunches in the field before washing like the picture above), pruning vining crops like cucumbers, and keeping hot weather crops healthy and producing (like “flushing” pepper plants to keep fruit from growing in the center where it will grow and break the main stem)

Naturally the cherry tomatoes started giving us great handfuls before we had any larger sandwich-sized slicer tomatoes ripe. I really loved growing the Arkansas Little Leaf cucumber again this year. First pepper to produce for us was a Cubanelle plant I had bought at southern states which makes me think I had started my own pepper plants too late last year (even though I started by Valentine’s Day!) if I want peppers in late June.

My cucamelons grew like never before. I put in 10 plants at the end of May to share the backside of the same trellis as most of our tomatoes- which worked great at first.

Soon, though, the cucamelon vines outgrew the tomatoes and I think keep the tomatoes from getting as much air flow as they needed (started seeing diseased leaves on the tomatoes!).

In the first week of August, I ripped out this many of the cucamelon vines in favor of letting the tomatoes take priority. Definitely could have done that sooner. I left just 2 or 3 cucamelon plants, which was enough for us, since we had been eating loads of cucamelons since mid July.

Back under control (see the difference on that front pole that the vines had overtaken)

Ground cherries were another fun surprise! I put in 3 plants total and we got a lot of them (even still have some in the freezer waiting to be made into pie!). Good thing they were yummy because they were labor intensive to harvest! The plants grow right above ground level in a big wide canopy and you have to squat down low and gently pull back the canopy to find any ripeing fruit (or pick it off the ground)

Our kids never developed a taste for them, but Nate and I easily worked through them week to week. Unfortunately, a new variety of tomatoes I grew—Black Strawberry (the red striped tomatoes pictured)—were beautiful but pretty tasteless/poor texture, so that was disappointing, especially with how much they produced for us. Meanwhile, we missed harvesting so many ground cherries that proceeded to grow into whole new plants during the same season, so we just barely had a second batch ripening at first frost!

Corn—both sweet corn and popcorn—were new to me this year, and definitely a lot of fun to grow. We had a slow start, since critters kept digging up our corn seed we had planted in mounds, or chewing down the very young plants when the did get started in the ground. Soon they were growing fast in the heat!

First full ripe ear of sweet corn.

Many of the ears ripened all at once in early August. On our biggest harvest day, we pulled 25 ears.

None of us was brave enough to try eating the huitlacoche, an edible fungus that can grow on corn.

Grilled up with some cubanelle peppers.

The first year growing in the goat field garden I hadn’t stretched much beyond zinnias and nasturtiums, so I committed to adding in quite a bit more variety of flowers in 2022. Among these were sunflowers, celosia, sweet alyssum, chamomile, poppies, marigold, gomphrena, cosmos, echinacea, roselle, aster, bee balm, amaranth and salvia. Pictured above are the sunflowers as they got started.

The color range of zinnias still brought big wow factor. I loved adding in the larger cactus-type, as well as the very sturdy Queen Lime red zinnias. I learned a lot in the early summer about how best to harvest, feed and transport the flowers out of the heat of the field and through the 45 minutes in the car to get home.

These improvements in the flowers’ staying power made it possible for me to drop off rotating vases of flowers to the bagel shop each week.

In late July we had fully healed from all of the groundhog damage of spring and very early summer, and there was starting to be a serious countertop buffet: tomatoes of all shades and sizes, pickling cucumbers, long beans, cylinder beets, bell and shishito peppers.

Many days, food prep, packaging and preservation was the game. I did a lot of troubleshooting about how to best keep cucumbers, peppers, green beans, etc. fresh in the fridge after I had brought them inside.

Fortunately, I got into a good rhythm of emailing friends on a weekly basis to let them know what would be available to pre-order and pick up from our porch (flowers included!)

We had several great watermelon (Blacktail Mountain) to enjoy…

…and we tried out a new-to-me melon called Green Nutmeg, which was a variety of cantaloupe and had a really awesome shape.

The okra were super happy in the dead-hot-center of summer. They slowed immediately to a halt in September with the first cool nights. I started these plants inside and moved them outside next to a row of buckwheat cover crop.

Most noticeably, these aren’t green okra! This variety is called Jing Orange. The color fades to a pale purple when cooked. Harvesting these 1-2x a week wasn't enough and some grew too big by the time I came to cut them, so those got saved & dried for seed instead.

I tried planting most of my winter squash very late (around July 4th) because last year’s early June planting landed us right in squash vine borer moth mating season. Moving things back by a month only helped with vine borers a little, but definitely meant the squash had trouble getting enough daylight to ripen on the vine before frost on the October end.

Really loved adding on Honeynut squash this year, which is like a mini-butternut with a darker orange flesh. This many were ready to go in mid-Sept while we wanted an extra 5 weeks for the butternuts.

Lessons for next summer:

  • Giving tomatoes breathing room on their trellis

  • Expect melons and cucumbers to get hit with powdery mildew, and give them enough space between plants to keep it from knocking out the entire row (late summer got really soggy and the late cucumbers, melons and the dried beans that shared a trellis with them never recovered)

  • We tried out planting winter squash: go back to June planting next year! Maybe try some pheromone traps for the vine borer moths?

  • Support trellising for flowers! We got away with it for some tall flowers - it didn’t seem to be a problem for zinnias and celosia, but I lost some wonderful cosmos plants because they were exposed to big winds without much support.

  • Starting corn inside and transplanting it out into mounds worked great and meant fewer corn seeds lost to birds.

  • Even though I gave the corn stalks a good head start before planting pole beans at their base, the beans outgrew them and took down a couple groups of corn stalks before they could finish growing.

  • Tomatoes - we just don’t love the 2-bite tomatoes. It’s cherry tomatoes or big ol’ slicers for us. A few varieties were duds for us on flavor and texture (Hartmann’s Yellow gooseberry and Black Strawberry). Really loved the large sauce tomatoes (Striped Roma and Amish Paste) as well as any tomatoes with some purple tinge (Paul Robeson, Black Krim). I will always grow Sungold - 1 may be enough!

In mid-September, I was given permission to take over growing on the back 1/3 of my neighbor’s empty lot (this time a short walk from my house, unlike the 40 min drive to the goat field garden!). This space had been cultivated by a gardener who raised veggies and flowers and sold at our farmer’s market, but she hadn’t been there maintaining it for about a year, so here’s how much had grown up since (peep the persistent magenta celosia on the far left - next to the large stand of ragweed.

Step 1 in getting the plot ready was a heavy duty mow over as much as I could access. Once I hauled off as much of that overgrown material as the mower could knock down, I covered the area with a large silage tarp to try and germinate then shade out the weed seeds left behind. The silage tarp is still covering the area as of now (early Feb) since it takes much longer in the cool months to complete that solarization process.

My preparations for fall began the very first week of July - no time to rest on my laurels of the plants just starting to bear in the heat! It was time to start getting fall cabbage and overwintering Brussels sprouts ready to go.

I had some great, skilled help getting cabbages pricked out and potted up for use in our gardens as well as to sell on to friends for theirs.

My first round of fall brassicas had a tough transition—see the bluntly decapitated Brussels sprout above! I had put a light fabric over the plants to keep out cabbage moths, then added some straw to help retain moisture through the hot weather. Well, it turned out that there were a bunch of herbivores (crickets?) in the straw that were trapped under the fabric with the plants and they went to town. Fortunately, I had held back a good amount of the plants and got a second try.

Carving out space in the summer garden for fall broccoli and cauliflower.

2022 Growing Recap: Spring

I can’t (and also I can…) believe I didn’t post again after the beginning of May when I transplanted my spring transplants! I do want to make a record of what did and didn’t work last season (and what was just enjoyable!) before getting into the whirlwind of a new growing year, so I hope this post will serve as a visual recap. Ok, buckle up…

New projects in Spring 2022:

  • Winter sowing

  • Updates to my seed starting equipment

  • Garlic

  • Electric fencing

  • Perennials: asparagus and strawberries

  • Sidewalk flowers

  • In-person plant sale

  • Weed barrier fabric

  • End caps for my home raised beds

  • New flowers: calendula, poppies, chamomile

Winter Sowing and a Simple Greenhouse

I tried out winter sowing some of my hardy and semi-hardy annual flower seeds. Their germination was slow - the ones I sowed inside under lights 2 months later soon caught up to them, but it was still cool to see what I could do without grow lights during that antsy mid-January time when it’s otherwise too early to do much else.

These trays of flowers and lettuce were stuck out in the snow when my pop-up greenhouse tipped over from a winter storm! I can’t believe that lettuce fared so well - Crisp Mint was the variety of Romaine that held up well through the cold!

Go lettuce, go! No wonder it’s so hard to grow lettuce through the summer

I had to troubleshoot the location for my pop-up greenhouse - at first it was too exposed to wind and got blown over in a snow storm, then once I stabilized it, it was still getting too much afternoon sun, so we settled on a wall where it only gets sun through about midday to keep from overheating (even in the winter!). Even in that protected spot (in the picture) it got super hot and needed to be vented (which would have been easier to do without chickens in the yard)

At home, we continued the early spring tradition of picking young flower buds off of our redbud tree and pickling them

Overwintering Garlic

Cozy garlic (with puffy cloud of weeds!) bed

We had two mini-rows of garlic - both hardneck varieties that gave us garlic scapes! - that we mulched with straw and otherwise ended up with an unintentional mulch of spring chickweed and henbit. The garlic bulbs themselves were kind of a bust - all but about a dozen were pretty infested by white rot, which either came in with the bulbs from the seed company I bought them from, or was waiting dormant in the soil (unlikely, since this has never been a veggie garden before)

Don’t worry, I did end up weeding the bed after a “nap”

Hardneck garlic payout: scapes!

Oh, and some actual garlic bulbs

New Seed Starting Space

One big change I made in mid-Spring that set me up well for the future was taking the plunge and buying a grow light rack with UV bulbs. In the picture above you can see what my seed starting set up had been since 2020: one fluorescent shop light over a table, and trying to get as many plants under that single set of 4 bulbs as possible. I had to trade off getting the light as close to the plants as possible in favor of having the lights higher and available to more trays - not ideal! You can see the tray in the back there up on a tupperwear bin as a way to get those new germinators closer to the light.

Hooray! 3 layers of lights, holding a total of six 1020 trays. Everything performed better under the UV light with exception of peppers that missed the fluorescent lights’ extra heat. Still busting out of that space at night when I brought the larger tomato plants in from hardening off outside.

Making the Leap from Plant Donations to Plant Sales

I loved hosting my first in-person plant sale in late April. In 2020 and 2021, I had grown plants to barter with friends (including in 2020 trading for craft supplies in early April fo 2020 when my preschool kids were stuck home quarantining and Amazon was backordered on so many staples for weeks on end. It had been great fun to swap tomato plants for canisters of glitter and dollar tree craft kits…

…and it was also fun to have my friends come and and support me in my work by paying for plants that would go on to feed them at their homes!

We still had a bunch of plants available to donate too, so I looked into some new avenues for plant drops.

The kids and I attended our first RVA Gardening Facebook group meet up, where we swapped seeds and plants with other Richmond growers at the Sankofa Community Orchard

And we dropped a mix of starts at the Juvenile Detention center in Chesterfield where the staff were reinvesting in the greenhouse and raised bed gardens there. I had heard about the need through the same RVA Gardening Facebook group, where I also learned that the kids there at the detention center would get to grow veggies to be made into meals for the homeless.

Better Weed Suppression…

Adding a perimeter of weed barrier fabric really made mowing a lot easier, but also just finally helped the place look like a true, intentional garden plot. I had bought enough to cover the paths as well, but we were doing a better job at using the stirrup hoe to keep weeds down in the paths so we decided to skip adding anything additional.

…and the need for better Pest Prevention

We soaked and sowed snap peas on the last day of February, which was great timing - but we never got our crop as expected, because they were a big target of groundhogs in the area. I made a quick emergency purchase of electric fencing in early June to keep from losing the rest of our spring progress and it absolutely saved our summer!

I can’t believe we spent the first 12 months of the garden without any kind of protection like this! The garden itself is surrounded by wooden fencing to prevent deer, but there are groundhogs living 20 feet away in the barn, so looking back at old pictures pre-electric fencing is like looking at an open feast spread for the taking.

Carrying Peas into Late Spring

Meanwhile, at home we had a really nice pea year! I tried out putting a frost blanket over our trellis where the peas were growing in hopes of shading out the plants enough at the late spring and it bought us an extra week or two!

We had a good amount of snap peas up to the end of May (this photo is from May 27)

Intentional Spaces for Flowers at Home

At home, Nate and used one half of a galvanized fire pit ring on each end of our middle raised bed to give me a little more flower growing space specifically for herbs and flowers. Here’s the transplants on May 3rd (dill, asters and strawflower)

Here’s the endocarp on the opposite at the end of May: Tulsi basil, chamomile, dwarf sunflower and nigella.

…And Unintentional Space for Flowers

It took a while for us to realize that the “weeds” growing at the back door to the bagel shop (where the fallen seeds are swept out from the oven) were breadseed poppies! I got weeks of enjoyment over that trick - that these discarded seeds could grow up in the sandy cracks in the poorly draining sidewalk.

2nd Year Rhubarb

At home I had planted a rhubarb crown in the spring of 2021, so I was happy to see it return in early spring 2022.

The rhubarb plant tried to flower several times, which I wasn’t expecting! I think the spring temps were higher than it liked.

We did get a modest harvest for year 2! I was careful not to cut many stems because I had lost a plant a couple years ago when it didn’t have enough energy going into the winter. I left 2/3 of the stems to be safe.

Adding Perennials to the Goat Field Garden

In mid-March we had a nice weather day for planting, so we pulled back some tarp that had been sitting on top of terminated oat/pea cover crop through the winter and prepared the soil for strawberry, rhubarb and asparagus crowns.

I had bought both June-bearing and ever-bearing strawberry plants and decided to put the June-bearing ones out here where I can come harvest a big batch all at once—saving the ever-bearing ones for home we we can harvest regularly, here and there.

Does this scraggly root bear any resemblance to it’s future fruit, the asparagus shoot??

This was the most digging we’ve done, with rhubarb needing a 12”x 12” hole per plant and asparagus needing an 8” wide, deep trench.

Prepping for spring was demanding across the board - the easiest to handle being the surface annual weeds, and the toughest being these deeply taprooted burdock that popped up (again) everywhere and needed to be deeply dug to keep from just snapping the woody root partway.

Spring is for Tomato Prep

This photo from April 2nd shows the black silage tarp on top of terminated winter rye, which we had mowed down right before covering. This would be our future tomato row.

My dad added two widths of cattle panel laid out horizontally to serve as our trellis, with a total of 3 large posts down the row. We were able to put in 18 tomato plants at 2’ spacing. Luckily they were left pretty well alone by the groundhogs (this was 6 weeks before we ended up adding a perimeter of electric fencing!) I think largely due to the marigolds I had planted on the reverse side of the tomato plant trellis.

A stretch to include this in the Spring recap, but here we were in late June with a full tress of Sungolds!

Other highlights of the Spring

At home: Red Russian kale, broccoli, sumo long cucumbers, beets, early green beans, calendula and nigella blooms

Some pride-inducing over-wintered leeks! Hefty!

Poppies and chamomile at the top of the spring pea row

A Danish Flag poppy

A went ahead and bought a flat of marigolds in May and it was so nice to have something already boldly flowering among all the green spring growth.

Easter egg radishes - like candy from underground!

Spring plants are in!

I planted broccoli and mustard greens just before a colder-than-seasonal stretch of cold nights (22 degrees overnight at end of March). At home where I planted them in raised beds and then covered with thin frost cloth, they are doing great, but in the goat field garden where we planted them and left them uncovered, the broccoli were pretty heavily damaged and may not make it.

Fortunately, more plants are going out into the gardens, since the plants that need to stay inside are multiplying into more and more space—I’ve put poppies, chamomile, leaf and head lettuces, sweet peas and calendula out into the garden so far.

I’ve been reading like crazy about succession planting and hoping to try for 2 successions of tomatoes, peppers and eggplants within the same summer season, plus thinking strategically about what veggies to get in and out in a short enough window to allow for the longer fall crops to go in this July.

Time for seedling Tetris!

It’s the time of year where every plant I’ve started inside is growing bigger and requiring larger containers, more quickly than I can graduate any to life outside. I end up here every year.

Typical early March situation!


I start each type of tomato, for example, in a 6-cell tray, but put 2 seeds in each cell to make sure I’ve got full germination and — ta da! That often means 12 of each type of tomato, because I can’t toss any of the 12 that I just brought back to surprising green life on a dreary February day.

A 6-cell tray of tomatoes (on the left) and another 6-cell of peppers, all ready for being planted deeply in bigger containers.

Potting up young broccoli. Re-trying Cow Pots for some of my plants once they are ready for more space. I am still deciding if they work well for me, since (unlike plastic) it takes them so long to dry back out after watering, since I have to pack them in tightly under my single grow light.

Luckily I have the little greenhouse this year to use for plants that are ready for daylight and can handle the spring temps! You can see my lettuce trays in the background there that I’m using to start most of my flower and lettuce seeds. Those would be perfectly fine in the yard (not in the greenhouse) but it’s an easy place to keep them all together for now.

My 4 year-old sidekick loves having her turn with the pump sprayer

Aiming for a longer growing season in 2022

I’ve got overlapping goals for my home and field gardening in 2022, but one theme will definitely be extending the growing season this year over the past year. In 2021, we were still prepping the goat field soil in June to put in the first squash plants late that month, so we didn’t have the benefit of overwintering plus early spring growing.

Here at home, I have been more eager than ever to start seeds (maybe it’s a second year of COVID? Or the fact that we have had pretty regular hard freezes and consistently colder temps than recent years). Two big moves here on the seed-starting front have allowed me to start early without getting stuck inside with giant adolescent plants before the weather allows them to move outside:

  • A new, simple greenhouse structure for hardening off seeds I’ll start in our garage

  • Wintersowing cold hardy flowers: I’m following some neighbors’ lead and starting some of my flower seeds in clear plastic containers (I’ve got lettuce trays from the grocery store, 2 liter soda bottles and take out containers to work with!). The idea is that these varieties of flowers need the freezing outdoor temperatures to trigger their germination, so why not let them start outside in the cold but in the controlled environment of the mini-greenhouse some trash can offer!? I’m trying this with:

    • 3 varieties of poppies

    • Strawflower

    • Wild bergamot/bee balm

    • Calendula

    • Love-in-a-mist

My dad and I with our last wheelbarrow-ful of squash to share

Varities to continue from last year:

  • Pole beans on trellis

  • Pickling cucumbers

  • Watermelon

  • Nasturtium

  • Sunflowers

  • Zinnia

  • Swiss chard

  • Red Kuri and butternut squash

  • Seminole and Connecticut field pumpkins

What to try differently or improve over last year:

  • April/May transplants and direct seeding

  • Start eggplant, tomatoes earlier (last year we transplanted in mid-July)

  • Increase flower diversity

  • Stick to edible squash varieties

  • start squash a week or two later to dodge  vine borer (and harvest in october)

  • Consider landscape fabric for squash patch

  • Freeze more green beans

  • Troubleshoot ruby buckwheat

  • Keep working towards soil health in my home raised beds (where I’ve struggled with root knot nematodes) by adding another round of beneficial nematodes, plus fortifying seedlings as they get transplanted with some good bacteria from Arbico Organics

New attempts this year:

  • Popcorn, sweetcorn

  • Three sisters companion planting for corn, squash and pole beans

  • Winter sowing flowers

  • Hardening off seedlings in greenhouse

  • Onions from seed

  • Perennials: rhubarb, asparagus, strawberries (in permanent beds?)

  • New annual flowers: poppy, strawflower, globe amaranth, echinacea, aster, bee balm, sweet pea, marigold  (plus continue calendula, zinnia)

  • Snap peas

  • Overwintered hardneck garlic

  • Teepee with scarlet runner beans? Sweet pea?

All that's not squash!

Adding a photo-heavy post here full of 2021’s successes, before I finalize my goals and new experiments for 2022!

IMG_6272.JPG

A second chance at heirloom tomatoes!

All of my large tomatoes at home caught some kind of bacterial wilt early in the summer, so I was down to only cherry tomatoes at home. I started these Kellogg’s Breakfast tomato seeds pretty late—first week of June or so—and they got rolling at the end of August! Hornworms absolutely descended on these. I picked off 8 over the span of 10 minutes on 1 visit (after thinking that deer had gotten into the field! There were so many leaves missing from the tops of the tomato plants). I brought a bunch of still-green tomatoes home with me that day in case I wasn’t going to be able to stay on top of the bugs and was going any chance at slicing tomatoes. The green tomatoes felt a little hollow so I thought it was a long shot, but they got hefty and golden inside!

IMG_6273.JPG

Black Mt. Watermelon delivered on flavor

IMG_6458.JPG
IMG_6701.JPG

Black-eyed peas —more than just a cover crop

Rattlesnake beans, for fresh and dried use

Pulling out the black-eyed peas to prep for winter rye. We worked around the sorghum stalks so the grains could finish maturing.

Bean-picking date night

Plates loaded with drying black eyed peas, rattlesnake beans and cowpeas. Looking pretty glorious alongside zinnias and tulsi basil!

Meanwhile, in our raised beds at home:

The year of the tomatillo! Before roasting…

…and after roasting, ready for blending into salsa verde!

Our other big dinner staples were cherry tomatoes and edamame

The broccoli seeds I started failed, but these seedlings I bought and put in this fall matured right close to New Year’s, just ahead of some hard frosts

Flippin' Beds

In a very early episode (Season 1, ep 2!) of the No-Till Market Garden podcast, Alex Ekins of Ace of Spades Farm proposed to the podcast host that this is the moment of delineation between so many styles of farming —what will you do in this moment where the spent crop is still sitting in the soil and you need to prepare the bed for the next round of growth.

“That’s the moment when it all happens - the reason why a tractor exists…what do you do in that moment? What do we do with organic matter that exists above ground, what do you do with the root matter that exists below ground…what are you looking to achieve in that moment? There’s a lot of dialogue, to talk about what happens next, because every kind of farming follows from that moment. You either till, or you use herbicide to kill it back, or you graze animals on it, or you just only clear the surface matter, which is what we’ve started to do. Or you tarp it, or you flail mow it, or you power harrow it. You have all of these things available to you, but it’s just like—what’s your goal? Where are you trying to get to next. I think that’s the moment that’s most interesting to me.”

I had several rounds of experience planting in the Goat Field Garden between June and now, but this will be our first try at flipping a bed for the next period of either dormancy or production. I had thought I would feel settled about removing the pumpkin vines (to compost or, for the ones brutalized by squash vine borer, to the burn pile) and covering the majority of the field back up with the silage tarp until spring planting. Now that it has come time to make that call, months under suffocating plastic seems really disruptive and unnatural, when we still have weeks or months to get some photosynthesizing plants on the scene before deeper winter.

Instead of just tarping the fields, we will try a couple ways to get the field back in use ASAP:

Trial 1: Silage Tarp —We ended up terminating a small section of the field early (planted with buckwheat and clover, plus some dying vines that had wandered over from the Blue Hubbard and Red Kuri squash rows). At the end of August, we mowed the cover crop and mulch there on the ground, then placed a section of silage tarp on top in anticipating of planting some winter seeds there after about 4 weeks (late Sept), which would still put us in good timing for spinach, kale, lettuces to germinate.

Trial 2: Pusher mower—In a separate section of the field, after giving the squash vines a couple more weeks to produce, my dad mowed down the finished vines on the soil surface with the push mower, leaving most of the root matter intact. In a spur of the moment decision we decided to move my parents 6 chickens onto the garden to get after the hoards of bugs that surfaced when we mowed over the vines and displaced them all. Soon, we will scatter cover crop seeds to grow up over the fall and winter:

  • For one area we will plant some cover crops that will die over the winter—oats and peas—which means with enough frost the cover crop will die off naturally and form a mulch to protect the soil from erosion + protect the tiny stuff in the soil until the next warm season. In the early spring we will be able to rake the cover crop debris off from the bed and plant into it pretty directly. Hoping these beds would be the early spring beds—onions, beets, carrots, snap pea.

  • For the other area, we will plant some cover crops that will grow right on into the spring—rye, hairy vetch and crimson clover. These will need to get knocked down and tarped in order to end that set of plants’ life cycle and form a nice mulch bed to transplant seedlings into. This will be the perfect place for tomatoes, peppers, cucumbers, etc. late next spring.

Meanwhile, the seed garlic has arrived! It will go in the ground soon when we pull off the silage tarp next week, hopefully along with flower seeds I wanted to try overwintering (echinacea and poppies).

In the Pumpkin Patch: Gleaning!

I mean, we had hopes of hauling out some serious poundage of pumpkins. We just weren’t sure it would actually play out - would the plants survive the transplant shock to the exposed, sloping field with heavy clay? Would groundhogs keep the plants from thriving? Would the abundant vines start fruiting before the bugs won out?

Early on, the Blue Hubbard and Red Kuri had a serious headstart despite being planted only a week before the rest. We went ahead and tried out eating some Red Kuri squash before it had hardened/fully-ripened and it was great on the grill!

IMG_6720.JPG

Eating the Red Kuri as a pseudo-summer squash

IMG_6743.JPG
A pollinated Blue Hubbard blossom, early on (these things got to be more than 12” long!)

A pollinated Blue Hubbard blossom, early on (these things got to be more than 12” long!)

Blue Hubbard check-in.  Bigger, but still green and growing!

Blue Hubbard check-in. Bigger, but still green and growing!

Compared to the images in the last post (from July 26), the pumpkin patch expanse become an entirely different creature than the nicely distinct plants and varieties as we planted them. Gone was any sense of row paths, gone was the hope of mowing the edges of the field to keep it more walkable, gone was any predictability about what squash or pumpkin would fruit up where, since the vines had criss-crossed each other so thoroughly.

Unlike the rest of the squash vines sporting yellow flowers, these fuzzy Birdhouse Gourd vines have white flowers (that mostly only open in the evening)

Unlike the rest of the squash vines sporting yellow flowers, these fuzzy Birdhouse Gourd vines have white flowers (that mostly only open in the evening)

Young butternut squash

Young butternut squash

Young Connecticut Field Pumpkin

Young Connecticut Field Pumpkin

By the 3rd week of August or so the vines of at least our earliest planted squash were starting to die back and allow the squash themselves to be super conspicuous, so we decided it was time to go ahead and get that first round out of the field and into the barn before curious taste-testers started to show up to the scene.

IMG_7548.JPG
Our first wheelbarrow-full!

Our first wheelbarrow-full, at the very end of August

It is seeming like the most prolific are the Birdhouse Gourd plants - which are unfortunately…
1. decorative and inedible
2. the only variety I am also growing at home in my backyard garden.
..but they are totally impressive.

We are letting the squash finish curing in the barn, on a shelf that was already covered in straw to give them a nice place to dry out.  They would probably do better to be out in the sunlight a little longer as they cure, but we can’t take the critter risk!

We are letting the squash finish curing in the barn, on a shelf that was already covered in straw to give them a nice place to dry out. They would probably do better to be out in the sunlight a little longer as they cure, but we can’t take the critter risk!

Second wheelbarrow full, less than a week later! This time featuring butternut squash, spaghetti squash and Seminole pumpkins.  Definitely all on the green side, but these were all swarmed with squash bugs so we figured they would have better luck in the barn.

Second wheelbarrow full, less than a week later! This time featuring butternut squash, spaghetti squash and Seminole pumpkins. Definitely all on the green side, but these were all swarmed with squash bugs so we figured they would have better luck in the barn.

I wish we had a scale to get a good measure of what our yield was for each variety, but we certainly got a haul! We started with 5-6 plants each of the different varieties, and lost just a couple to squash vine borers in late July.

Pests/Challenges:

  • Some of the vines were very heavily chewed - presumably by the rabbits we saw running in and out of the jungle

  • No groundhogs after all!

  • Squash vine borers got into about 2/3 of the plants by mid-July. We had to cut them out of the stems in several rounds and it definitely took the plants down some notches - a few didn’t recover.

  • Squash bugs like I have never seen before took over by the start of August. We didn’t even try to stop them - handpicking has been my usual attack at home, but that wasn’t an option at this scale. By the time they were pressing hard, so much of the fruit was already set and looking pretty good, so we just let it happen.

  • We even got away with a trip away in the middle of August with no one to water/tend the garden at all, thanks to a couple pretty serious rain storms. My dad did a great job keep the plants watered for all the other weeks of the hot, dry summer. I saw some pretty happy mushrooms tucked up under the vines at the plant stems in a bunch of spots!

A month in the ground

It’s mid-July and we have planted the full 38’ x 50’ plot! We pulled back the silage tarp row by row as we were ready to plant, with the first plants going in after under 2 weeks, and ended up with 11 rows at 38’ long each.

A peek at the squash plants after the cardboard was done and before we added compost and straw.

A peek at the squash plants after the cardboard was done and before we added compost and straw.

Instead of tilling the soil to start, we dug out holes right into the heat-killed weeds and added some compost collected on the property, then transplanted in squash and pumpkin plants (which I had started inside from seed at the start of June). Surrounding each plant, we lay down cardboard my neighbors were giving away and topped that with additional compost to help slow weed growth. We had some lightly composted straw that we ringed around the plants to help with water retention.

Gus loaded up with the sweet potatoes, marigolds and perennial herbs we were interplanting into the squash vines

Gus loaded up with the sweet potatoes, marigolds and perennial herbs we were interplanting into the squash vines

In addition to the squash + sweet potato rows we planted our first larger block of cover crop of buckwheat and clover. I just emptied some larger seed packets full of the 2 varieties into a yogurt container, then asked my son Gus to scatter it over the area. The kids also helped by sowing clusters of cowpeas between the 1st 2 rows of squash, then I went back through and interplanted some sorghum seeds.

IMG_6189.jpg

During that first week we tested a soil sample and were so pleased to find that the topsoil in the field (before even adding compost!) tested as high in nitrogen and adequate in phosphorus, plus in healthy pH range making for a great foundation to build on.

Nate and my dad putting down lime to mark the rows.  Millie in the foreground planting cowpeas.

Nate and my dad putting down lime to mark the rows. Millie in the foreground planting cowpeas.

SQUASH, etc. KEY: BH - Blue Hubbard / RK - Red Kuri / Ct - Connecticut Field Pumpkin / BhG - Birdhouse Gourd / Bn - Butternut / Sg - Spaghetti Squash / Se - Seminole Pumpkin / SwP - sweet potato

We kept the upper right stretch of the plot (the white rows and pink rectangle above) under the silage tarp for a couple extra weeks, which was a huge help. Now that the full field has been uncovered we can so a tremendous difference between the rows that were under the tarp for 2 weeks vs. those that got the full 4 weeks or more. So far, there’s almost no weed growth (beyond what we brought in with the compost) in those later rows that got more tarp-time!

Update: once the squash had been in the field for about 1 week.

Update: once the squash had been in the field for about 1 week.

One Saturday we put in the remaining transplants - watermelon, eggplant, tomatoes interplanted with zinnias, calendula and sunflowers.

This final round of planting was super satisfying, because it matched my vision for what I had hoped permanent in-ground raised rows would look like. We marked out the rows with a rope tied to a brick and dumped wheelbarrow loads of compost along the line until we had several inches thick of pretty good tilth to plant seeds into. I smoothed the compost over with our bed prep rake, then gave it another pass with the prep rake loaded up with some row marker tips that carved out several parallel lines so we could drop in seeds for several mini-rows side-by-side.

IMG_5872.JPG

Finally, we reserved the far right corner for another stretch of buckwheat and crimson clover, to serve as both future green manure plus draw some pollinators in that all the squash will need ASAP.

Take-aways at 1 month:

  • Next time we use the silage tarp, I will try to take the time to spread out the compost under the tarp so that the weed seeds in the compost get heat-killed. We’ve got burdock root popping up all over that was growing in the compost!

  • Planting sorghum and cowpeas between rows of squash is already quite crowded after the first month of growth, since our rows are only 3’ (with 20” paths). Some of those interior squash plants are going to be on their own for bug control very soon!

  • I thought we might have some beginner’s luck and escape pressure from squash vine borers this first year (maybe the moths wouldn’t find us yet??) but we absolutely had some tough ones to remove.

  • The deer fence was working —until it wasn’t! We had something get in and chew up leaves from the spaghetti squash and pumpkin plants, but my dad added a higher cross bar above the gate where they seemed to be getting in. Otherwise, the rabbits are paying us some attention and are chewing on the sweet potato vines plus marigold flowers (which were there for pest control - mission not accomplished)

The first season of planting

Initially, we had planned to leave the silage tarp on for a full 4 weeks to kill all weeds and weed seeds. I’m getting restless to wait for the full 4 weeks this late in the season and I’ve been listening to testimonies from various no-till farmers who have been able to prep a bed with just a week or 2 under silage tarps, so we will experiment by uncovering half of the area after just 2 weeks and let half get the full 4 weeks of solarization.

I’ve been back and forth about what width to use for the rows, but I think I’m settling on 30” since that will match the width of the bed prep rake I ordered from Johnny’s Selected Seeds. I’m not super into gear and tend to err on the side of not getting what I need, so I’m really stretching myself to get a couple of long term tools. In addition to the rake, I also purchased a stirrup hoe for weed cultivation plus a bunch of row marker stakes that I may use to mark out the initial raised bed rows as well. I am expecting to need to buy a broadfork in the next year or 2 if we stick with the no-till route, since we won’t be using heavy machinery to combat compaction in the soil.

Getting a head start on spreading compost and transplanting into the first half of the plot will also give me a better idea of whether I need to purchase additional compost beyond what my dad has collected on site. Initially I had expected we would need something like 3” depth all over, but most of the reading and podcast listening I’ve done has shown me that 1-2” will be plenty. At 3” depth I would have needed 10 cubic yards of compost - which was a big expense, but mostly I was having a hard time picturing how I would get that much spread as quickly as I would need to on a single trip, since the garden is not where I live full-time. A total goal of 5 yards of compost, split up into 2.5 yards for each prep day will be much more realistic!

A pumpkin patch for fall

L-R: Birdhouse gourd, Blacktail Mountain watermelon, Blue Hubbard squash, Butternut squash, California Giant zinnia, Connecticut field pumpkin, Seminole pumpkin, Zeolights calendula ,Spaghetti squash, Red Kuri squash, Mammoth sunflower, Kopec eggplant

Another big motivator for getting the first set of beds in ASAP has been the squash plants. I started them as seeds inside at the beginning of June and now - as of June 18th - they have been potted up once and are looking enormous and super ready to survive outside through the fall.

Sowing late-summer cover crops

I’m excited to try a couple of summer cover crops that should grow into the fall and die off naturally over the winter. These sorts of plants give a few advantages:

  • Keep the soil and compost covered: When no big-ticket veggie crops are growing, the bed needs to be covered to protect the topsoil from erosion, plus insulate some of the important life that goes on below the soil that we’ll want to be there ready to go when we plant again with veggies in the spring

  • Attract pollinators (especially the flowering barley)

  • Create a big mass of green “manure”—essentially just grows a bunch of material that can be used as future mulchy compost

L-R: White buckwheat, Takane Ruby buckwheat, Crimson clover, Cowpeas, Black Amber Cane Sorghum, Deep till radishes

I’m excited to try out some cover crop combos, like:

  • Buckwheat + crimson clover: The buckwheat is great for pollinators and can shade the more-sensitive clover as it gets started. Buckwheat also gets an easy start at choking out other weeds.

  • Sorghum + cowpeas: the cowpeas can grow sprawled out on the ground, but with something upright and sturdy (like sorghum canes) growing nearby, the pea plants can climb and get some better production. Cowpeas are also edible (i.e. black eyed peas), and the sorghum (if we leave it long enough for it to put out seeds) makes great chicken food.

  • Deep till radishes with any of the above can help bust up clay soil and get some drainage into soil where we won’t be dragging though with a tiller.

"Breaking Ground" without Tilling: Day 1 on the no-till garden plot

When we had initially brainstormed “Step 1 “ for preparing the field for veggie gardening, we thought our decision would be between:

A. purchasing a tilling attachment for the tractor

B. renting a labor-intensive hand-tiller

My dad with a post hole digger, surveying the field he marked out for a veggie garden plot.

My dad with a post hole digger, surveying the field he marked out for a veggie garden plot.

At just that moment of decision I remembered having seen a grower from outside Blacksburg, VA preparing a pumpkin patch using a large black tarp. I got in touch with her to find out more about where she had purchased her silage tarp. Soon after, I came upon several no-till resources in a row, including the No-Till Market Gardener’s podcast and Charles Dowding’s book Organic Gardening: The Natural No-Dig Way (published in 2007), all of which made so much sense in bringing together my limited experiences with soil health.

My respect for handling soil with respect began with a huge mistake I am still trying to counteract.

In the spring of 2019 I had added a significant amount of sand to the compacted soil in our raised beds that was no longer draining well. The idea—which was recommended to me by zero growers!—was a disaster. Starting right away in the following months I was dealing with parasitic nematodes in the soil throughout that summer and fall, which showed up as root damage in everything from Swiss chard to beans, to sweet potatoes, to tomatoes.

Swiss chard roots with root knot nematode damage

Swiss chard roots with root knot nematode damage

I removed as much of the damaged root material as I could that fall, solarized 1 bed to see if I could make a dent in the parasitic nematodes, sought out nematode-resistant varieties of beans, peppers and tomatoes for the following year and hoped for better results. The spring/summer of 2020 showed similar widespread nematode damage, so I decided to make some more dramatic changes over the fall to eradicate the nematodes.

I reached out to Marco at Microbes by Marco in the summer of 2020 to ask for his input about fixing nematode trouble. He said that there shouldn’t be trouble with nematodes unless there is a serious imbalance in the soil. Up until then, I hadn’t realized that my input of of so much inert sand had really messed with the soil food web in my soil, compounded by the fact that I hadn’t done much to “feed” my soil since we had initially installed the beds in 2015 (only minor additions of home compost per year).

For the fall of 2020, I wanted to both add beneficial soil activity and target the nematodes I wanted to starve out. I ordered some inoculated grains from Microbes by Marco in hopes of jumpstarting the indigenous microbial growth in the soil, as well as Neem Seed Meal (2.5 lbs per 4’ x 4’ bed).

By the end of Feb 2021, we made a couple more moves. Gus and I did some extensive soil testing with a home-kit and found the soil was deficient in both Nitrogen and Potassium/potash, but pH level looked pretty good. I bought kelp meal (potash source), alfalfa meal (nitrogen, potassium and other elements), crab meal (nitrogen and calcium source, plus nematode reduction) and Black Kow (nitrogen) compost.

Once the early spring seeds that I had seeded directly started sprouting, I was already starting to enjoy the visible improvement. Time will tell if we have the root damage from nematodes that we had in the past, but the above-ground growth is already super improved.

So with that short-term exposure to the impact of feeding soil rather than feeding plants, I was ready to try out a very different approach to prepping the rural plot for its first in-ground beds. We knew there would be some good underground activity there, even if there were dense clay soil not far below the topsoil, because the field had been used for both goat and cow pasture in recent years, with lots of happy weeds on top to show for it.

June 11th - Step 1: heat-kill all existing weeds and their seeds.

After a quick mow with the tractor, we unfolded a 24’ x 100’ foot silage tarp over the ankle-high weed growth. We were able to easily cut the length of the tarp and overlap the 2 pieces to cover an area of 50’ x 38’. We covered all of the edges heavily with bricks and large 2 x 6 barn wood boards to keep it in place through an upcoming summer storms. We will leave it in place for 4 weeks through the upcoming hot weather and trust that trapped heat will do the weed-killing for us, without destruction to the beneficial visible and microscopic networks of creatures in the soil.

Silage in place.  In the summer, it can take as little as 3 weeks to heat-kill weeds.

Silage in place. In the summer, it can take as little as 3 weeks to heat-kill weeds.